A joint is where the ends of two pieces of wood connect together. It allows unconnected pieces to be combined into one larger structure. The end product is furniture that looks good and lasts well for years to come.
The process of making a joint involves sawing away at the edges, which makes it easy for the pieces to fit together. If a piece of wooden item is not joined correctly, it can easily break when in use.
For your joint to look great and last forever, make sure the two pieces are exactly the right shape and size to fit together perfectly, with no gaps or loose ends.
Importance of Wood Joints In Woodworking
Wood joints are an important element in woodworking and construction. They are crucial in making quality wooden items.
Joints are used to assemble pieces of wood together in a way that is strong, stable, and visually appealing; without the use of adhesive or fasteners. Some of the main benefits of using wood joints include:
1. Durability
Properly made wood joints can be very durable, withstanding the stress of use. The durability of a wood joint depends on many factors including the type of joint and the wood quality.
2. Strength
The main aim of joints is to supply the project with strength and hold it together securely. Wood joints are designed to be strong and resistant to forces such as bending, twisting, and shearing. This helps to ensure the stability and durability of the finished structure.
3. Versatility
Since there are diverse types of joints, woodworkers can choose the most appropriate joint for their specific project needs. The versatility of wood joints is important because it allows you to choose the best joint for a given project based on the specific requirements and constraints of that project.
Different Types of Wood Joints & Uses
Explore the many types of wood joints and their applications below.
1. Butt Joint
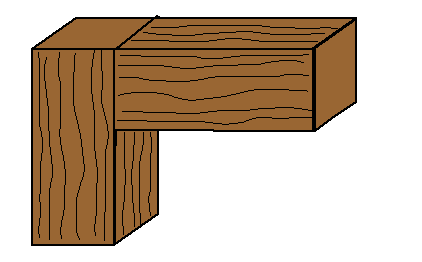
A butt joint is a basic wood joint that involves simply placing pieces of wood together end-to-end. It is one of the simplest and most common wood joints.
To create a butt joint, align the two pieces of wood so that they are flush against each other with their ends touching. Use fasteners like nails and screws or glue to ensure a strong and secure connection.
Uses of Butt Joint:
Often used in cabinet construction projects, decking, for legs of a table, a sandbox, picture frames, etc.
Cons
2. Miter Joint
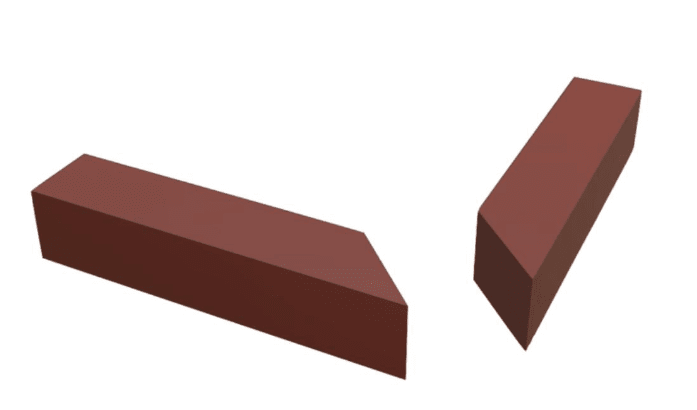
Here, two pieces of wood are joined together typically at a 45-degree angle. Miter joints are known for their clean, seamless appearance.
They are often used to create corners such as in the construction of picture frames. This joint needs reinforcement for more strength. Use a pinner or pneumatic brad nailer to improve your chances of having a strong joint and provide added durability to your project.
Uses of Miter Joint:
The miter joint is perfect for picture frames, corners of cabinets, boxes, and frames for mirrors or artwork.
Cons
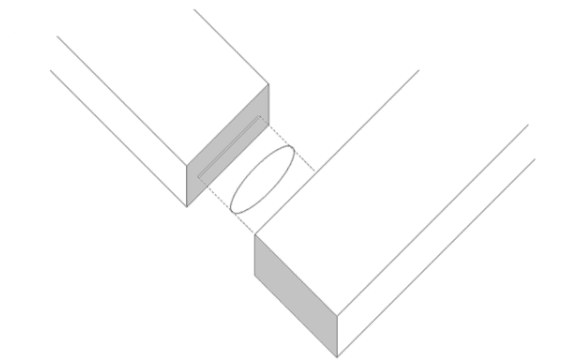
3. Dowel Joint
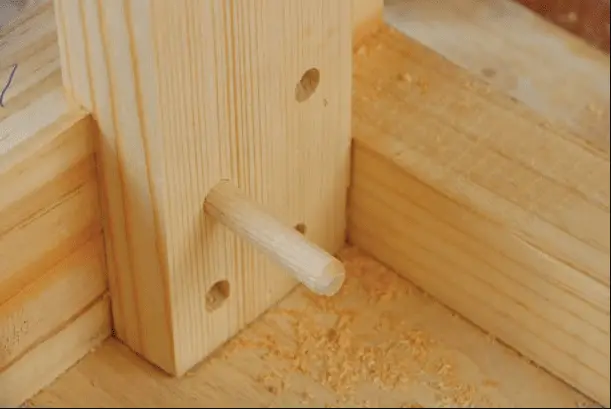
Dowel joints are often used as an alternative to other types of joints to connect two pieces of wood. A dowel joint is made by inserting a cylindrical piece of wood called a dowel into holes in the material being joined. You will have to split the dowel in two and insert half into each piece of wood. The dowel is then typically glued in place to create a strong, permanent connection.
Uses of Dowel Joint:
Dowel joints are commonly used in the construction of shelves, furniture making, wooden toys, etc.
Cons
4. Mortise and Tenon Joint
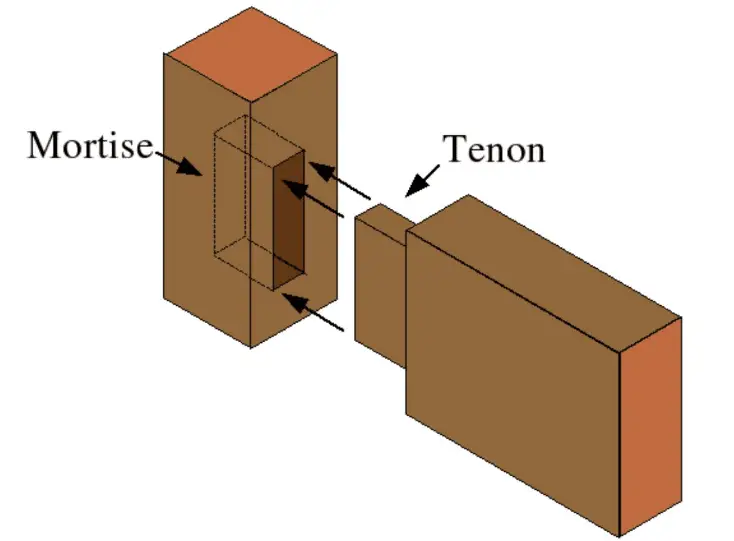
Mortise and tenon joints are a common type of joinery used in carpentry and furniture making to connect two boards at a right angle. The mortise is a slot cut into the piece of wood that will be attached to the other piece. A tenon is a projection on the other piece of wood, which will fit into the slot.
Uses of Mortise and Tenon Joint:
Mortise and tenon joint has been used for generations and it’s still one of the strongest joints available today. It’s often used to join furniture legs and cabinet frames.
Cons
5. Tongue Groove Joint
It consists of a protruding tongue on one board that fits into a matching groove on the other board. To create a tongue and groove joint, one board is cut with a tongue along one edge. The other board is cut with a groove along its edge that is slightly wider than the tongue on the first board. When the two boards are joined, the tongue fits into the groove, creating a tight, seamless connection.
Uses of Tongue and Groove Joint:
Tongue and groove joints are often used because they provide a strong and stable connection that can be easily assembled and disassembled. They are used for plywood flooring, wall paneling, and ceilings.
Cons
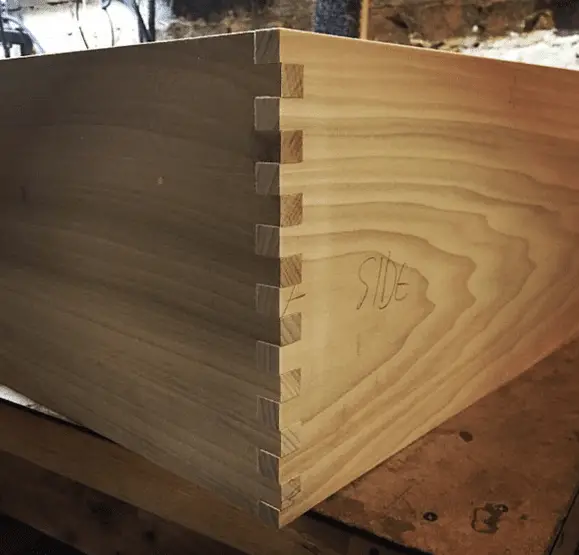
6. Dovetail Joint
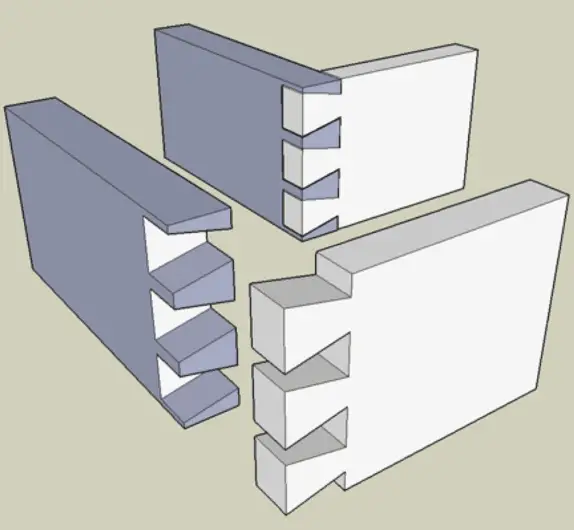
This type of joint is popular for its tensile strength. It is characterized by the interlocking tails on one piece of wood that fit into corresponding pins on the other piece.
The tails and pins fit together like interlocking fingers, forming a strong and durable joint that does not require any fasteners, such as nails or screws, to hold it together.
Uses of Dovetail Joint:
Dovetail joints are used by woodworkers to join the front of drawers to the sides and to join cabinet sides to the bottoms.
Cons
7. Rabbet Joint

It is created by cutting a recess into the edge of one of the wood pieces and then fitting the other piece into the recess. Rabbet cuts are made manually or with hand tools or power tools like a router or table saw.
It is quite easy to use hand tools to make the rabbet cuts, however, it’s going to take more time.
Uses of Rabbet Joint:
The joint is a great choice for drawers and cabinet doors. It is also used for creating insets in picture frames.
Cons
8. Biscuit Joint
To make a biscuit joint, a hole is drilled into each of the pieces of wood that are to be joined. A biscuit, which is a small piece of wood, is then inserted into the holes.
The biscuit swells when it absorbs moisture from the glue, creating a strong and tight joint. They are needed to stop your joint from pulling apart.
Uses of Biscuit Joint:
Biscuit joints are mostly used to join edge grain to edge grain.
Cons
9. Finger Joints
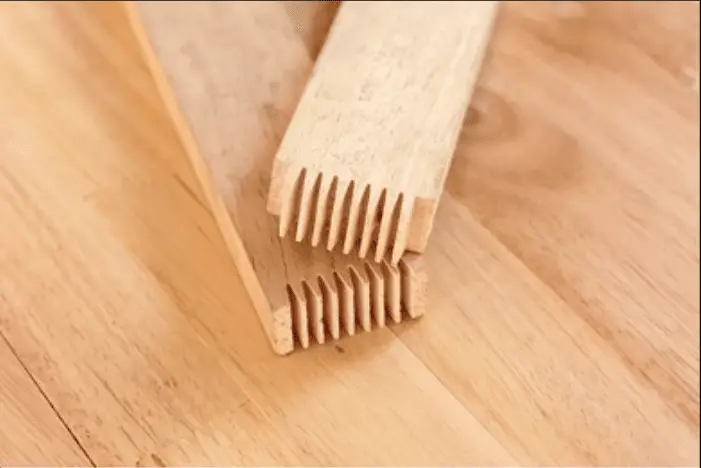
Here, interlocking “fingers” fit together to create a strong and aesthetically pleasing joint. They are known to hide the joint line; giving the finished piece a clean and seamless appearance. The end of each board is cut with a series of interlocking fingers using a table saw blade. The pieces are then glued together, with the fingers fitting snugly into the corresponding grooves.
Finger joints are very similar to dovetail joints, although they don’t have as much strength.
Uses of Finger Joints:
A finger joint is used to add some length to a board.
Cons
10. Lap Joint
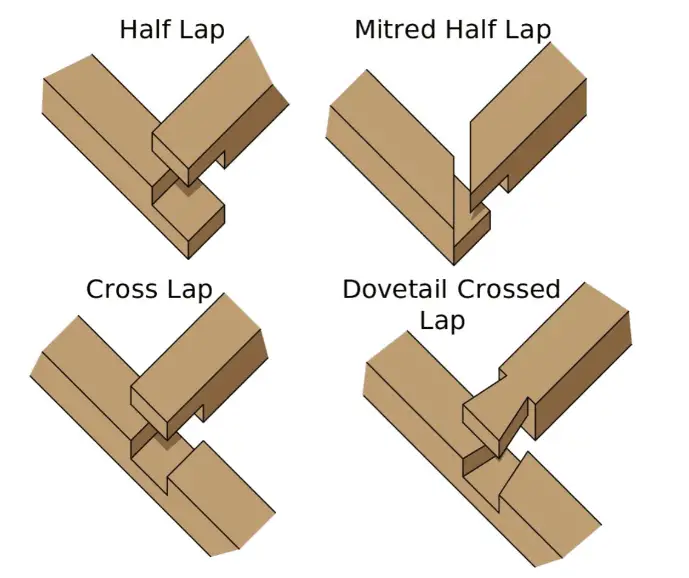
An overlap joint/lap joint is a type of wood joinery in which two pieces of material overlap each other. It can be used to bond plastic, metal, and wood. A lap joint is created by gluing the faces of two long grain boards.
There are several types of lap joints, including mitered half-lap joints, half-lap joints, end-lap joints, cross-lap joints, and dovetail crossed-lap joints.
Uses of Lap Joint:
Woodworkers use lap joints to make decks, patios, frames, boxes, cabinets, and some other furniture.
Cons
11. Box Joint
Box joints are often confused with finger joints, but they are quite different. They join two pieces of wood at right angles to each other. Box joints are typically used in carpentry and woodworking to join the corners of boxes, drawers, and other box-like structures.
Uses of Box Joint:
A box joint is used for the sides of box-like structures like drawers, hexagonal boxes, etc.
Cons
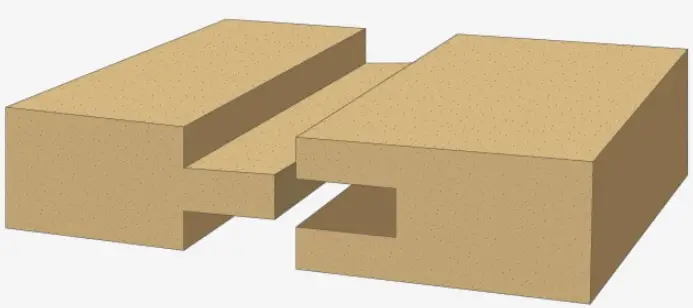
12. Dado Joint
The joint is similar to the rabbet joint. However, instead of being cut on the end of the board, it is cut on the face. It is created by cutting a slot in the side of one board and then fitting the other board into the slot. A dado is cut perpendicular to the grain of the wood.
Uses of Dado Joint:
A dado joint can be used for joining shelves, cabinets, bookcases, and drawer dividers.
Cons
13. Bridle Joint
They are efficient and strong and can be used in place of a traditional mortise and tenon joint. Bridle joints have both the mortise and tenon on the ends of the boards. They are easier to construct than mortise and tenon and have similar strength properties. While the tenon has two stuck-out sides, the mortise has an open-ended slot. These slots are then interlocked by placing one member across the other.
Uses of Bridle Joint:
Perfect joint for workbenches, picture frames, and for joining rails to legs.
Cons
14. Pocket-Hole Joint
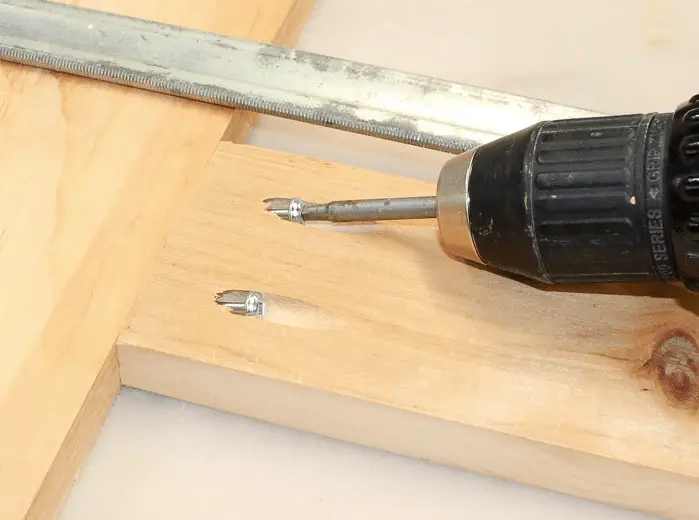
A pocket hole joint is when you use screws at an angle to fasten a butt joint. The holes are drilled between the two boards to create a tight bond without using adhesive.
To create a pocket hole joint, holes are first drilled into one of the pieces of wood at an angle, usually about 15 degrees. Using a self-tapping screw, the second piece gets attached to it.
Uses of Pocket-Hole Joint:
Pocket-hole joints can be useful for stairs, picture frames, cabinet frames, and edge bending.
Cons
15. Birdsmouth Joint
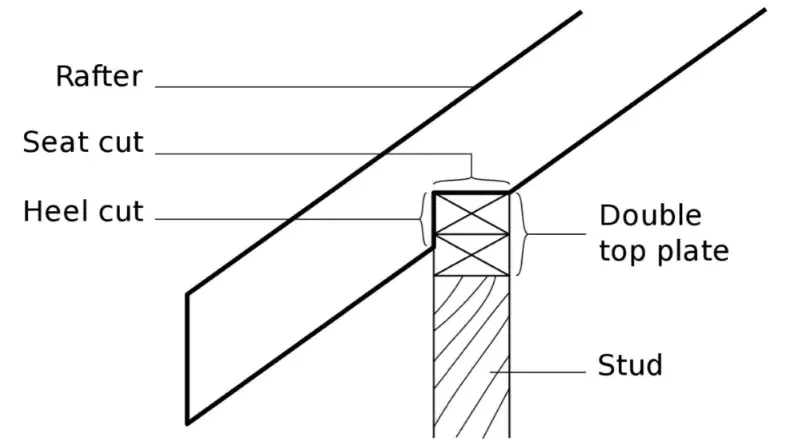
A birdsmouth joint is a popular method of interlocking roof rafters to the top plate on supporting walls. It is a strong and reliable way to transfer the weight of the roof to the supporting structure. The joint is found in many construction projects today.
Uses of Birdsmouth Joint:
Birdsmouth joints are used for roofs, fences, stairs, kennels, and garden sheds.
Cons
Frequently Asked Questions
Key Takeaways
The art of woodworking lies in the mastery of joints. Joints are used to assemble furniture or hold together different components of a project. You need to understand wood joinery and apply it to your projects to create beautiful and functional items. If you know how wood joints work, then the sky’s the limit in terms of what you can construct.
By familiarizing yourself with the various types of woodworking joints and understanding what they are good for, you are taking a big step toward mastering your craft.