Wood carving is a rewarding and relaxing hobby that allows you to create awesome pieces using just a few tools. You get to learn about woodworking and gain a deeper appreciation for the natural beauty of wood.
If you’re just getting started, it can be overwhelming to decide on your first wood carving project. That’s why we’ve compiled a list of project ideas ranging from simple to more challenging ones.
Whether you are interested in carving decorative pieces, functional items, or something in between, there is something on this list for everyone. So if you are ready to leap into the world of wood carving, let’s get started!
Wood Carving For Beginners

If you are a beginner looking to get started with wood carving, there are a few requirements that you’ll need to consider before diving in.
Tools
The first thing you will need is a good set of wood carving tools. Below are some essential wood carving tools for beginners:
1. Carving knives: These are the most basic wood carving tools you need. You will want to ensure you have a selection of knives with different blade shapes like the spoon knife, wood-carving knife, whittling knife, and hook knife.
2. Pencils: Pencils are often used as a tool in wood carving because they let the woodworker sketch out their design and make markings on the wood before starting to carve. They also add finer details to the carved piece.
3. Protective Finger Tape: The tape protects your fingers while you are wood carving. It provides a barrier between your fingers and the sharp edges of your carving tools.
There are several benefits to using protective finger tape while wood carving:
- It prevents cuts and scrapes while you’re carving. This is especially important if you’re working with sharp tools or rough wood.
- It provides a better grip on your tools making it easier to control them while you carve.
- It reduces fatigue. If you’re carving for an extended period of time, your fingers can start to feel sore and tired. Protective finger tape can alleviate some of this fatigue by providing a cushioning effect.
4. Chisels: Chisels are used for removing chunks of wood and shaping wood surfaces. They come in various sizes and styles including mortise chisels, beveled edge chisels, and Japanese bench chisels.
5. Gouges: Gouges are special tools used for creating curves and other intricate shapes. They have a U-shaped blade with a concave curve on the bottom. Gouges are used to carve shallow or deep hollows on wood surfaces.
6. Veiner or V-Tool: V-tool also called the U-gouge has a sweeping downward edge that’s great for creating lines and details. It is often used for accenting table legs.
7. Whetstones: They are used to sharpen and hone the edges of your carving tools to keep them sharp and ready for use. As a beginner, learn how to use a whetstone to maintain your tools. Ensure they are always in good working condition.
8. Safety Goggles: As a beginner, always wear safety goggles while wood carving to prevent injury. They protect your eyes from wood chips, sawdust, and other debris generated during the carving process. If a piece of wood were to fly into or close to your eye, it would cause serious damage.
Workspace
You will be needing a dedicated workspace for your wood carving projects. This could be as simple as a corner of your garage or basement or a more elaborate setup with a workbench, clamping system, and other tools. Just make sure that you have enough space to work comfortably and safely.
Good lighting is essential for wood carving as it allows you to see the details of your work clearly. Natural light is always the best option but if that’s not available, consider investing in good adjustable lighting.
Wood
The wood you choose for your project can have an impact on the final result. Some properties worth considering when selecting wood for carving include:
1. Hardness: Harder woods are more difficult to carve but they tend to hold their detail better and are less prone to damage. Softer woods are easier to carve but may not hold up over time.
2. Grain: The grain of the wood affects how your carving will look and how easy it is to work with. Wood with a straight grain is generally easier to carve than wood with a wavy or interlocking grain.
3. Weight: Consider the weight of the wood as this can affect how easy it is to handle and carve. Lightweight woods are easier to work with but may not be as strong or durable as heavier woods.
4. Color: The color of the wood can also be a factor because it will affect the final appearance of your carved item. Different types of wood have different colors which can give your carving a unique look and feel.
For example, if you’re looking for a light wood color, you might choose basswood which has a creamy white or pale brown color. On the other hand, if you want a more rustic look, you might choose a wood with a darker color such as walnut or cherry.
Experimenting with different wood types can be a fun and rewarding part of the process.
What is the Best Wood to Carve for Beginners?
Wood types that are not too hard are best for beginners. They are easier to carve and work with than extremely hard wood. Popular options are white pine, basswood, butternut, and aspen.
10 Beginning Wood Carving Projects Ideas
Ready to turn a block of wood into a work of art? Look no further! We’ve compiled a list of carving wood projects that will have you whittling like a pro in no time.
If you are new to wood carving, these carving projects are a great place to start. They are all relatively simple yet still offer plenty of room for creativity and personalization.
| S.No | Small Wood Carving Ideas |
| 1 | Carving a wooden spoon set |
| 2 | Carving a wooden bowl |
| 3 | Carving a wooden heart |
| 4 | Carving chopsticks |
| 5 | Making a walking stick |
| 6 | Gnome whittling |
| 7 | Carving a flower |
| 8 | Spirit carving |
| 9 | Whittling an owl |
| 10 | Cat carving |
1. Carving a Wooden Spoon Set

It is always a good idea to start simple. Wooden spoon sets are an excellent way to get your feet wet without committing to large projects. They are simple to carve as they don’t have a lot of intricate details. By carving wood spoons, you get to easily learn basic carving techniques; hence, it is a good project for beginners who are learning the basics of the craft.
Spoons are not particularly difficult to master but they do require some patience and dedication for you to achieve a high level of skill. The first spoon you carve will likely be your least favorite however don’t get discouraged if your first spoon doesn’t turn out well. Once you’ve mastered the basics, you will be able to create some truly striking spoons.
One other great thing about carving a spoon set is that you’ll end up with a functional item that you can use in your kitchen. This adds a practical element to the project, which can be satisfying and rewarding.
Hardwoods like walnut, paper birch, cherry, maple, and poplar are good options for carving spoons.
2. Carving a Wooden Bowl
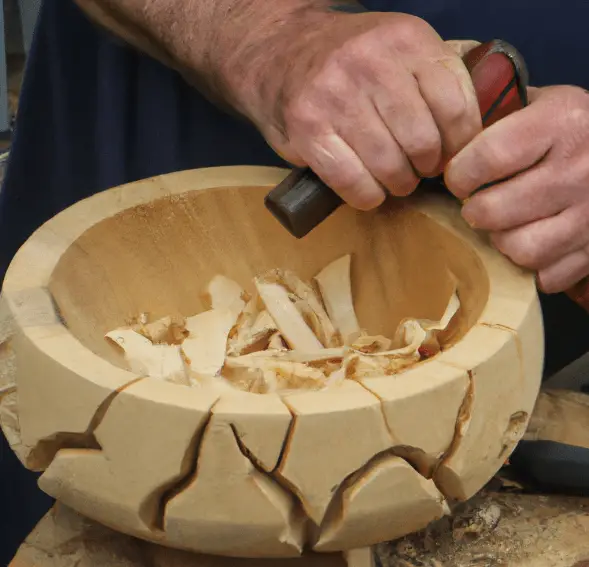
Beginner wood carvers are often intimidated by complex projects, but carving a wooden bowl is not that complex. Wood bowls are easy wood carving designs.
Carving a wooden bowl can be a great project for beginner woodcarvers because it’s a relatively simple project. It does not require special tools and would not take long to complete. Basic tools like an axe, 220-grit sandpaper, a whittling knife, and wood varnish are required for the project.
Next, choose the right type of wood for your bowl. You don’t want to use wood types that will warp over time. Instead, use woods such as cedar, beech, or pine because they won’t warp easily or crack when you carve them into shapes.
Wood is not a good conductor of heat, so wooden bowls and plates are not well-suited for use with hot food. However, they can make for beautiful and unique decorative pieces in a home. In addition to being used as decorations, wooden bowls and plates can also be used for serving cold foods such as fruit and salads.
3. Carving a Wooden Heart

Looking for a customized Valentine’s Day present for a loved one? Whittle a chunk of wood into this nice heart-shaped gift. A wooden heart makes a thoughtful and romantic gift for a loved one; you get to show off your skills while also creating something unique for someone special.
It’s also a good project for those who are just starting out as it doesn’t require advanced skills or techniques. You don’t need to be a skilled carver to do it. It can be done by anyone and it doesn’t require any special skills or equipment. Beginners get into wood carving hearts without having to invest in expensive equipment. All you need is wood, some carving tools (a carving knife, pencil, and 220-grit sandpaper), and a little bit of patience.
Many types of wood can be used for carving a heart. Some options to consider include beech, pine, butternut, balsa, or cedar.
4. Carving Chopsticks
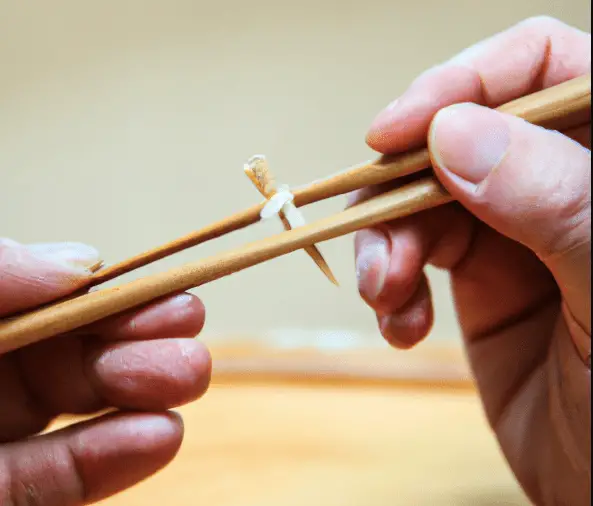
It might seem like a daunting task to carve chopsticks but it’s actually not that hard! It is indeed a great project for a beginner to learn many wood carving and whittling skills. Carving chopsticks is a good way to practice basic techniques such as chip carving and whittling.
Chopsticks are small projects that can be completed in an absolutely short period. They can be carved using just a few tools like a carving knife or chisel which makes them an affordable project for beginners. They are great for learners who want to quickly see the results of their work. Carving chopsticks with rounded edges, however, is quite challenging as it requires meticulous skills to create a smooth and even surface.
The process typically involves cutting the chopsticks to size, sanding them to remove any roughness or imperfections, and then polishing them to achieve a smooth and shiny finish. Before applying any finish to your chopsticks, be sure to sand them smoothly and wipe away any dust or debris. Use a non-toxic finish on chopsticks as they will be getting into contact with food.
5. Making a Walking Stick
Carving a walking stick introduces you to the art of wood carving. It doesn’t have to be something complex—you can carve a simple stick and leave it at that. But if you want to learn how to make a truly beautiful piece, carve wizard faces on it.
There’s something very satisfying about taking a piece of wood and turning it into a functional object. Walking sticks are useful for a variety of purposes including hiking, backpacking, or just using them as a fashionable accessory. By carving your own walking stick, you’ll have a one-of-a-kind piece that you can use and enjoy.
Additionally, a handmade walking stick makes a great gift for someone who loves the outdoors. It’s a thoughtful and personal gift that is sure to be appreciated.
You’ll need a piece of wood for the walking stick, a knife for carving, a pencil, and sandpaper for smoothing the surface. You may also want to have a design in mind.
Choose a piece of wood that is strong and straight. Good options include sycamore, oak, birch, basswood, or limewood. Avoid wood that is too soft or too brittle as it may break or splinter while you’re carving.
6. Gnome Whittling
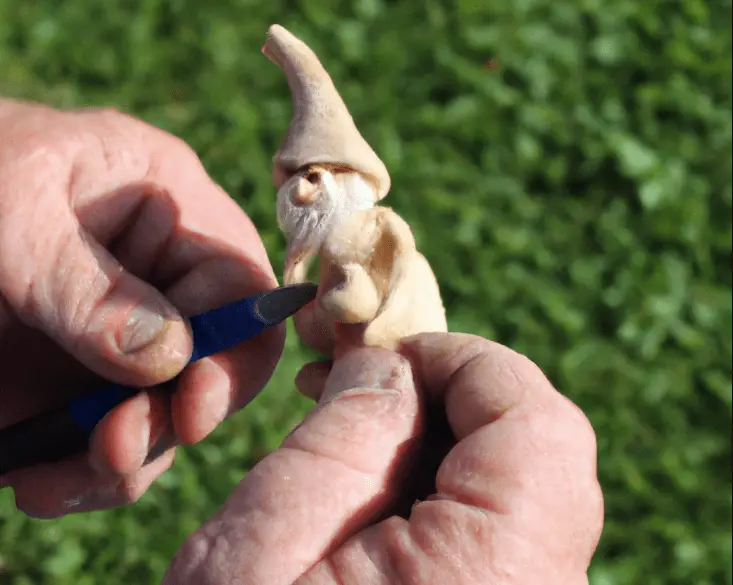
Once you’ve mastered the basics, go on to carve something more advanced like whittling a gnome.
Gnomes are adorable and can be used to decorate a wide range of spaces. Whether you’re starting a new garden or just want to add a little whimsical flair to your window sill or office desk, a wooden gnome is a perfect addition.
It’s helpful to have a clear idea of what you want your gnome to look like before you start carving. For beginners, it’s best to start with a few basic tools such as a carving knife, a pen, and a chisel. Begin by roughing out the shape of your gnome using your carving knife. Gradually refine the shape and add details using other tools.
Select your wood carefully. Woods like basswood, cherry, maple, birch, or limewood are good choices for beginners because they are easier to carve.
Whittling a gnome can be challenging. Take your time. Don’t rush the process. Take breaks when you need them and be patient with yourself as you learn!
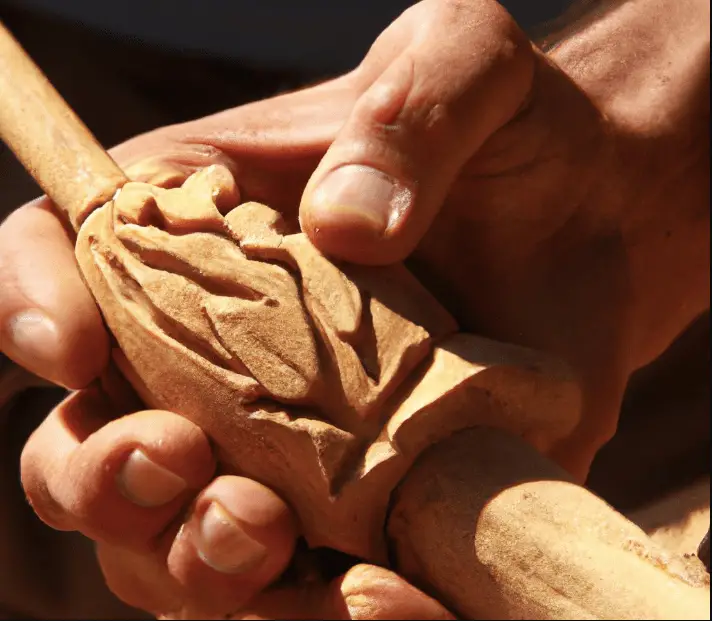
7. Carving a Flower
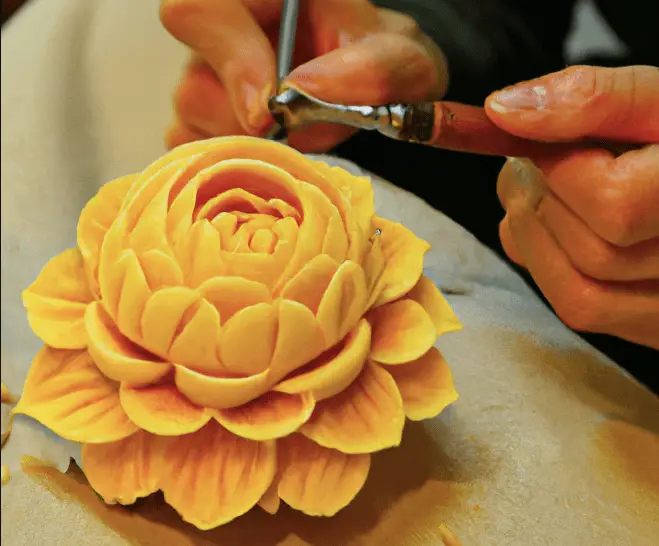
People love flowers because they are beautiful. Additionally, they make cool presents for lovers of nature. You can start with a small and simple flower, then add to it as your skills improve and you gain more confidence.
You can either carve them out of a wood surface or by creating 3D flowers. To carve a flower out of a surface, the carved areas will stand out from the surrounding wood. With the 3D method, you whittle a 3D object that can be viewed from any angle.
The best wood for whittling a flower are basswood, birch, mahogany, and cottonwood bark. Carving flowers out of these wood types can be done with a few basic tools. Some common tools that may be used include whittling knives, a chisel, a pencil, and a V-tool.
Remember to always use caution when carving and to take breaks to rest your hand and wrist if they become tired.
8. Spirit Carving

Spirit whittling is one of the oldest forms of folk art. You carve small wooden figurines often with a human-like appearance out of blocks or tree stumps. Figurines are often used as decorative items or as talismans to bring good luck and happiness.
Carving a spirit requires you to use your imagination and creativity to come up with a design, and it can help you develop your artistic skills.
Also, carving a spirit can be a soothing and therapeutic activity that helps you to relax and clear your mind. It is an excellent way to reduce anxiety levels, relieve stress, and get rid of negative energy by focusing on something other than current events or problems in life. The act of carving requires concentration and focus on the task at hand.
9. Whittling an Owl
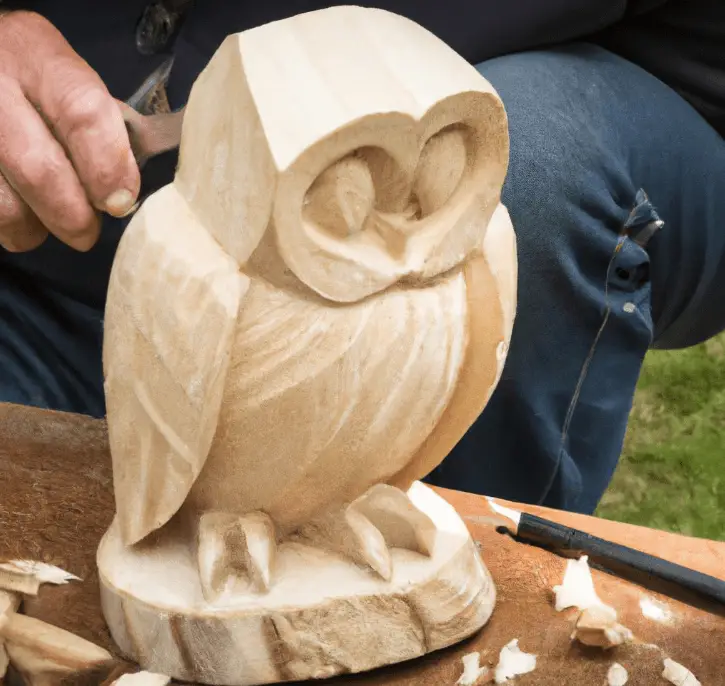
Whittling an owl requires you to use a variety of hand and knife techniques and it can help you improve your fine motor skills and attention to detail. Depending on the level of detail and complexity of the design, whittled owls can range from easy, simple wood carving designs to more intricate ones.
The amount of time it takes to carve out an owl will depend on several factors including the size and complexity of the design and the skill level of the person doing the whittling.
Owls are often associated with wisdom and the natural world. Whittling an owl connects you with these themes.
Whittled owls can be a thoughtful and creative gift for birthdays, holidays, or any other occasion. You can add color to make it more playful and fun. It can also be a unique and interesting decorative piece for your home or office.
10. Cat Carving

If you’re looking for some fun and easy carving, whittling a cat might be the way to go. You learn some essential techniques when carving a cat.
To whittle a cat figurine, you will need a sharp knife and a piece of wood like basswood or butternut. You can use a pencil or pen to sketch out your design on the wood, then use your knife to carefully cut away the wood around the outline of the design. Remember to always use caution when working with a sharp knife. As you work, use a series of progressively finer grit sandpapers to smooth out the surface of the wood and remove any rough edges.
After you have finished carving your cat, apply a wood finish or paint to protect the wood and enhance its natural beauty.
To Round Things Up
So there you have it, ten unique wood carving project ideas for beginners to sink their teeth into.
Whether you’re a seasoned pro or a complete novice, we hope these beginner easy wood carving designs have inspired you to pick up a chisel and give wood carving a try. From spoons and bowls to figurines and decorative boxes, the possibilities are endless when it comes to creating beautiful and unique pieces from wood. So grab your tools and get to work – your masterpiece is waiting to be carved!