Trees are cut down, and the wood undergoes many transformations before becoming a frame or furniture. Bending wood turns straight solid wood into an elegant curved shape. Wood bending is frequently required in projects such as making furniture, musical instruments, or crafts.
There are a few factors that should be kept in mind while bending wood. The first thing to look into is the type of wood used. Just because a few types of wood are better suited to bending than any others, you must choose the best type for the task. The second factor to consider is the texture of the wood. Bending only with the grain is easier than bending over it, so keep this in mind when planning to bend the wood.
In this article, we will introduce you to various methods to bend wood.
Wood Bending Techniques
Method 1: Cold Bent Lamination
Laminates are reffered to the thick strips of wood typically ranging in thickness of 1-4 mm
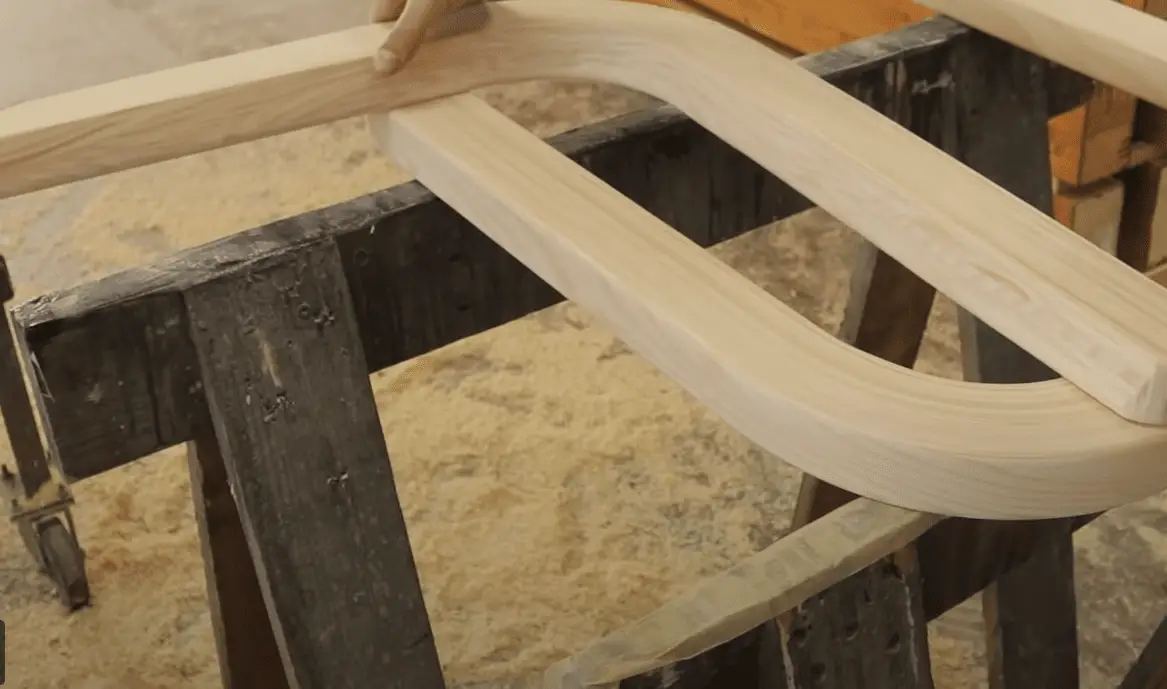
The thick wooden pieces cannot be bent easily but thin slices of wood can be bent easily. Bent lamination involves gluing together thin wood layers to form a curve, enabling you to bend the without cutting or steaming. It allows you to create sharp, inverse, and wide sections with consistent results for various parts.
Lamination results in a product whose grain entirely matches the curve. When paired with all of the face-grain glue joints, it offers considerable strength to a bent-laminated piece. An effective bend necessitates precisely machined laminates, cautious attention to glue, and consistent clamping pressure throughout the bend.
This process is versatile and can be utilized in various contexts. It works wonderfully for producing curved, straightforward components like door handles in small quantities. However, it is also capable of being extended to more complicated shapes.
Things You Need
- Accurately machined laminate (Laminates refers to the thin wooden strips)
- Glue
- Bending mold and clamps.
Steps For Bent Lamination
- Make sure that you already have a wooden mold ready of the same shape that you want to bend the wood into.
- Cut the wood that you want to bend into thin strips (2 to 4mm approx.) with the help of a panel saw or any other specifically designed machine for the same. For instance, a wooden piece 30 mm thick will gets cut into 7 equal strips of approx 4mm.
- You will see that each 4mm individual laminate is easy to bend as compared to the original 30mm thick wooden piece. Now the time is to glue the obtained wood laminate to each other until the required thickness is obtained.
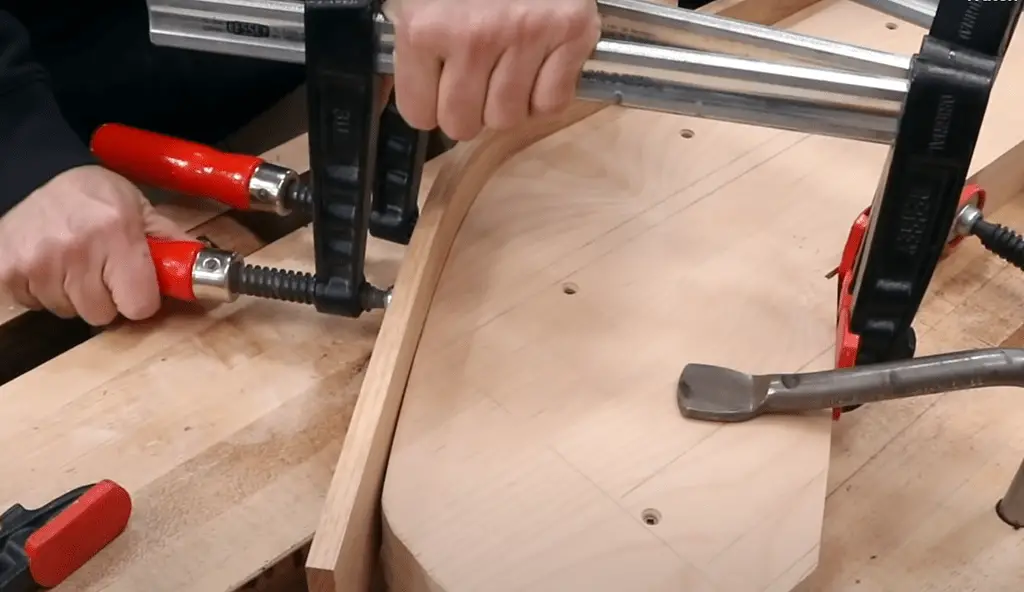
- Once glued together put the wood laminates into the wooden mold mentioned in step number one when the glue is still wet.
- Tie the wooden mold with the help of clamps.
- Wait for the glued laminates to dry. Once the glue gets dried take the laminates out of the mold and you will see that laminated will not retain back their original shape again.
Cautions
- Take special care when working on a panel show.
Method 2: Steam Bending
Although this method for bending the wood yields the best results but is a bit time-consuming as compared to other methods.
This method has one major drawback: it requires you to build a long, narrow box to steam the boards. A steam box, also known as a steam cleaner, has a hinged door across at one end and another end has an input to connect the steam pipe. In many cases, steam-bending is incredibly effective despite its seemingly excessive nature.
Wood before bending with steam needs to be softened a little bit. The wood can be softened by submerging the wood into the water for a complete night. Rapid wood softening can be achieved by heating water to a temperature above boiling (212 degrees Fahrenheit).
To bend with steam, wood needs to be thin and small. Because of their size, sheets of material are challenging to steam bend. Hardwoods like white oak, hackberry, and red oak are easily shaped into curves. Steam bending is ineffective on hard maple, yellow poplar, or soft maple.
Typically, wood is bent in a direction that is perpendicular to its grain. Cracks can form in wood if it is bent perpendicular to the grain.
Things You Need
- Steam generator
- Cordless drill
- Utility knife
- Spring clamps
- Wood
- Scrap blocks of wood
- 4-inch rubber gasket
- 2-inch hose
Steps For Steam Bending
Springback is the phenomenon of wood to retain back to its original shape. While making the mould make sure to atleast provide 5% more curve than the actually reuired.
- Meanwhile, one should start manufacturing the steam box during the softening process of wood. A steam box is an air-tight box typically made up of wood. This box is used to steam treat the wood that needs to be bent.
- Make a simple wooden box of 150x150mm and length per your requirement.
- Fix one end of the box with a hole of approximately two inches in diameter to allow the connection of the steam pipe coming from the steam generator.
- Make a hinged door at the other side of the box from where you will insert wooden pieces into the box.
- make 3-4 little holes at the bottom of the box to allow drainage of water produced through condensation.
- Connect the two-inch hose pipes coming to the fixed end of the box
- After making the steam box now it is time to keep your mold and clamps ready to bend the wood.
- Take the submerged pieces of wood out of the water and insert them into the steam box.
- Lock the hinged door and start passing steam into the box.
- keep steaming the wood for about an hour.
- After an hour take the wood out and align it with the mold.
- Clamp one end of the wood to the mold and start bending it with the help of other clamps by clamping wood to the mold one by one.
- Keep the wood clamped to mold for at least three days and then you can take the clamps off along with the bentwood.
Cautions
- Steam has the potential to cause serious injuries. Be cautious as you remove the lid of the steam box.
- Wear protective equipment, especially thick gloves, and eyewear, when handling.
Method 3: Kerf bending the wood
bending the wood pieces with the help of kerfs is being used since ancient times, but has grown in popularity in recent years thanks to its ability to produce smooth and creative shapes. The process is straightforward and requires only a few tools and materials, making it an attractive option for those looking to create unique shapes with wood.
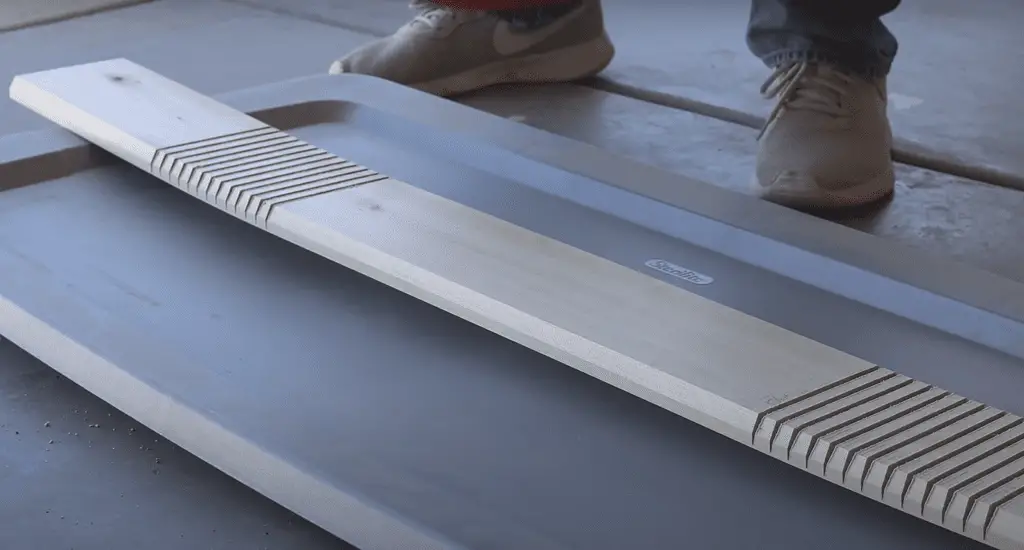
A kerf is reffered to the slit made on wood with the help of saw to give it emough space to bend.
When it comes to kerf bent, the tools and materials you need to complete the project are relatively simple. The main items you should have on hand are a saw, some clamps, a piece of wood, and a high-quality adhesive. The saw should be sharp and able to make precise cuts, while the clamps should be strong enough to keep the wood in place while the glue dries. Finally, the wood should be thick and of a quality suitable for the project.
The next item you will need is the adhesive. This should be of high quality, as it will be responsible for holding the wood together. A strong and reliable glue should be used, such as epoxy or polyurethane. Be sure to read the directions on the package to make sure you are using the correct amount and method of application.
Things you Need
- Saw
- clamps
- Pencil
- Eye and hearing protection
- Wood
- Wood glue
Steps For Kerf Bent Lamination
- The first step in kerf bent is to measure and mark the wood.
- Mark the location of kerfs that should be approximately half an inch apart from each other.
- Using the saw, begin to make the kerfs in the wood. Make sure to be precise and follow the lines you marked earlier. Once all of the cuts are made, start bending the wood and insert the glue into the kerf.
- With the help of clamps hold the bent wood firmly in position and leave it in the same position for at least a day.
- You can also apply steam or fabric softener to make the bending process much easier.
Cautions
- The first is to make sure that all of the tools you are using are sharp and in good condition. A dull blade will not make precise cuts, which can lead to a warped or uneven piece of wood.
- The second caution is to make sure that you are using the right amount of adhesive. Too little adhesive will not be sufficient to hold the pieces together, while too much can create a weak bond.
Method 4: Bending Wood with the help of machines
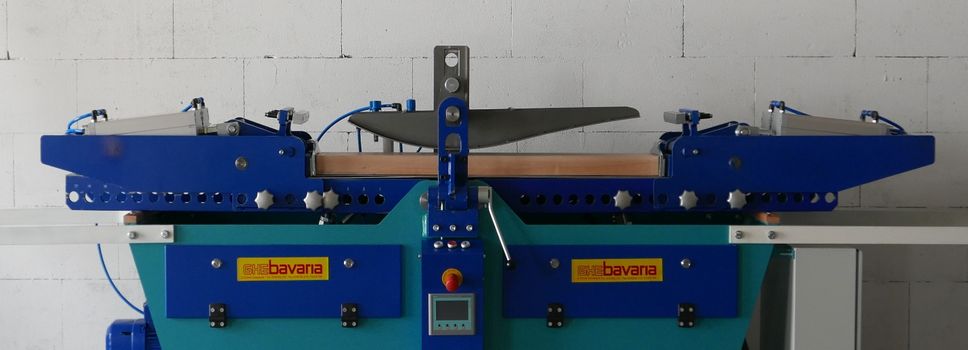
While the other three are the traditional methods to bend the wood. The quicker and comparatively easy method is to bend the wood with the help of modern machines. Despite calling this method a modern method it still works on any one of the above methods. In this article, we will be explaining how to bend wood with the help of a machine that comes from GHE Bavaria
Things You Need
- Bending Machine
- Clamp
- Form
- Protective glasses
- Wood
Steps For Bending Wood With Machines
- The first method in this method remains the same as above. Soften the wood by dipping it into the water for a night. Fabric softeners can be used to achieve a higher degree of softening.
- Make sure to create a mold of the shape that you want to bend your bend into.
- Take the wood out of the water and place it into the machine over the mold.
- Start the machine and it will bend the wood into the desired shape.
- Once the wood is bent into the shape use the clamps to hold the wood in position.
- Take the bent wood out from the mold and let it dry for 2-3 days. To fasten the drying process wood can also be kept in driers.
- Once dried properly take the clamps off and you will get your bentwood.
Cautions
- Make sure to wear the necessary safety equipment, such as protective glasses, gloves, and a dust mask.
- Also, use caution when operating the bending machine to avoid any injuries.
- Make sure to use the appropriate amount of pressure when bending the wood. Too much pressure can cause the wood to break or splinter.
Conclusion
Before beginning wood bending, you should become acquainted with the material and working techniques. Experience is essential in almost every field of craftsmanship as it is when bending wood. Even within a single species of tree, the wood in each trunk is unique due to variations in location, climate, age, and density, among other factors.
If you have the opportunity to look over the shoulder of a true professional, you should take it. Because softwoods have a greater density than hardwoods, they must be bent across the grain.
One of the most important skills a woodworker can possess is bending wood using water. It is common knowledge that this is one of the aspects of woodworking that can distinguish your work as a true artistic creation, making it stand out from other people’s crafts. It is never enough to learn the theory behind something new; you need to put that theory into practice.
All of the above methods are the most practical and commonly used methods. Video tutorials are given at the end of each process to give readers clarity about the processes. Should you have any queries please free to Contact us.