Sanding wood can be a tedious task but it is also a crucial part of any woodworking project. Whether you are smoothing out rough edges, removing blemishes, or preparing a surface for varnish, sanding is an important step that is required.
But what if you have got a wet chunk of wood?
Can you sand it or will you end up having a messy product? While it’s not recommended to sand wet wood, with a few tricks, you can get desired results.
So grab your sander and get ready to give your wood item a smooth, polished finish!
What is Sanding?

Sanding is a very common process in woodworking. It involves rubbing the surface of the wood with an abrasive to make it smoother. The process eliminates imperfections and bumps while also preparing the surface for staining or varnishing.
Sanding can be handled in either a manual or mechanical way. If you choose to do it manually, you will be needing sandpaper. Alternatively, you could use an electric sander which is often more effective and convenient for most wood projects.
Sandpaper with different grain sizes; from coarse to fine is used for various stages of sanding to get the desired level of finish.
Importance of Sanding in Woodworking
Sanding is an essential process in woodworking as it offers several benefits; some of which are:
1. Smooths Rough or Uneven Surface
It makes for a smoother surface by removing abrasions and rough fibers. For consistency, the process requires uniform contact between the abrasive material and the surface worked on.
Use a grit that will rid the wood of any roughness without leaving marks so you can have a very smooth project with minimal damage. By using different grits of sandpaper, one can achieve a smooth finish on any wood type.
2. Removes Stains
This largely depends on the type of stain and the severity of the staining. For instance, sanding can be very effective at removing superficial stains.
However, it may not be as effective at removing deep, ingrained stains. If the stain is deeply ingrained and cannot be removed with sanding, you may need to consider using a different method.
100-grit sandpaper is the most effective when it comes to eliminating stains. It is versatile and perfect for the job.
3. Attractiveness
Sanding makes a wood project look more polished and professional and brings out the wood’s natural aesthetics; it improves the overall appearance and attractiveness of the finished piece. With sanding, your project becomes more attractive to customers.
Taking the time to sand and finish your wooden projects properly significantly enhances their visual appeal. A well-sanded and nicely finished product will look more attractive than one that has not been adequately sanded.
To achieve a professional finish, use the right sanding techniques. Sand in the direction of the wood grain and use the appropriate sandpaper grit so your wood project is aesthetically pleasing. This can make all the difference in terms of its overall appeal.
4. Prepares The Wood For Finishing
It helps to prepare the surface of the wood product for the application of a finish such as lacquer or stains. When sanding wood in preparation for varnishing, start with coarse grit sandpaper (60 to 80 grit) to medium grit sandpaper (such as 100 to 150 grit) and work your way up to fine grit (180 to 220 grit).
Be careful when using a power sander as the high speed of the sanding activity can accidentally cause damage. It is often recommended to do the final sanding of a project manually.
5. Easy Maintenance
Properly sanding a piece of wood furniture makes it easier to maintain. Silk-smooth surfaces are much easier to clean with modern equipment like vacuums.
Can You Sand Wet Wood?

Recently-sawn wood that is in the midst of the drying process is referred to as wet wood. It still has a lot of moisture content and needs to be dried before it can be used for construction or furniture purposes.
Sanding wet wood is possible, but it is probably not going to give you the desired finish. It is best to avoid this practice to ensure the best results. Allow the wood to dry thoroughly before sanding to ensure a smooth finished surface.
If the wood is too wet to sand, you can use a microwave or a conventional oven to speed up the drying process.
How To Tell If a Piece of Wood is Wet?
- To detect whether the wood is wet, you can simply smell it. The smell of wet wood is very distinct and potent; dry wood, however, hardly emits any scent.
- Touch the wood. Wet wood will feel wet to the touch and may be slippery or slimy.
- Take a moment to weigh the wood. Wood that is saturated with moisture will be heavier than its dry counterpart.
- Pay attention to the acoustic qualities of wood. When damp, it will emit a higher tone compared to when dry.
- Investigating the grain of the wood can provide insight. When fresh, its pattern will be more visible than if it were dry.
- An easy way to figure out the moisture content of wood is to use a moisture meter. If the results show that it is too high, then it is deemed as wet.
Techniques To Sand Wet Wood
A belt sander is a preferred tool for sanding wet wood. It is much faster and more efficient than other methods, ensuring a smoother finish in less time. Sanding wet wood with a belt sander gives you the best results in terms of minimal time and effort.
Belt sanders are highly advantageous as they possess more power which helps to remove rough fibers more efficiently, thus preserving the integrity of the wood.
It is important to keep in mind there are certain risks when sanding wet wood with a belt sander. It can be harder to control and the sander may quickly get clogged due to the moisture present on the surface. Therefore, caution should be exercised when using this method.
When sanding wet wood, use the proper sandpaper grit to ensure the best results. The sandpaper should have a lower grit, as higher grit sandpaper may clog more easily and be less effective at sanding the wood.
Since the wood is naturally softer than a dry one, begin with medium-grit sandpaper and then progress to a fine-grit option once you’ve finished the first step.
This way, you’ll ensure you achieve success without risking damage to the surface.
The Effects of Sanding Wet Wood
To ensure the longevity of your project, allot sufficient time for the wood to dry before proceeding with sanding and finishing. Wet wood is more prone to rotting, hence why this step should not be neglected.
Some of the potential effects of sanding wet wood include:
1. Difficulty Sanding
Sanding wet wood is more challenging compared to sanding dry wood as it can cause the sandpaper to be less effective while accumulating clogs in the grit. You will find yourself fighting an uphill battle as the wet sand clumps together and clogs your sandpaper.
Moreover, wet wood can create a mess in your workspace, as well as being more difficult to work with due to its slippery nature. So, next time you’re tackling a sanding project, make sure to wait until the sand is completely dry before you start. Your surfaces (and your sanity) will thank you!
2. Broken or Splintered Wood Fiber
When wood is wet, the fibers are more flexible and prone to damage. Sanding wet wood requires care and precision as too much pressure or the wrong equipment can easily cause splintering or breakage of the fragile fibers.
3. Ruins Your Sandpaper
Sanding wet wood can be damaging to your sandpaper because it quickly wears it down which leads to more frequent replacement of sandpaper. When sanding wet wood, the grit of the sandpaper can easily get clogged with wood particles and water, this results in an uneven finish and may require replacing the sandpaper more often than usual.
4. Warping
Wood warping is a common issue and can be attributed to factors like changes in moisture content, storage, and variations in temperature and humidity. Sanding wet wood doesn’t help either since it heightens the risk of warping as it dries.
5. It takes Longer To Sand Wet Wood
Sanding wet wood may take more time than expected; the sandpaper may need to be replaced more often and multiple passes may be required to get the desired smooth finish. Take your time when sanding wet wood because rushing through the process may result in an unsatisfactory result or even disfigure the product.
The extra time spent on the task can be avoided by allowing the wood to dry completely before beginning the sanding process.
6. Poor Bonding of Finishes
Wet wood is a common problem when it comes to bonding finishes. The moisture in the wood prevents the finish from properly adhering which leads to a range of problems like peeling and flaking.
To ensure that your finishes bond correctly, dry out wet wood before applying any type of finish. Doing so will help ensure that your hard work pays off with a beautiful and durable finish.
7. Respiratory Problems
Woodworking with wet wood causes a large amount of dust which is hazardous to your health considering that it contains particles and chemicals that may harm your lungs when inhaled. It is best to take the necessary precautions by wearing safety gear when sanding wet wood.
8. Too Much Noise
Wet wood sanding and operating power tools create loud noises that can be damaging to a person’s ears unless they are wearing adequate protection. Additionally, it’s best practice to use a lower speed setting on the sander when sanding wet wood to reduce noise levels. Extended exposure to excessive noise could lead to hearing damage, anxiety, depression, or other health issues.
To safeguard your hearing from damage, using ear protection when using power tools or working with wet wood is essential. Options such as earplugs, earmuffs, and other hearing protection devices can reduce the amount of noise reaching the ears and keep them protected.
9. Poor Quality Finished Item
Sanding wet wood could lead to unsatisfactory quality of the final product. The surface may be bristly and the finish may not adhere properly.
Wood that is moistened makes the item more vulnerable to damage and difficult to sand in an even manner.
In addition to a rough surface, sanding wet wood can also cause other imperfections in the product. These imperfections could ultimately create a final product that lacks in quality and appearance.
How Long Must Wood Dry Before Sanding?
As a woodworker or DIY enthusiast, you know the importance of properly drying wood before sanding. Sanding wet wood not only produces less than desirable results, but it can also damage your sanding equipment. So, how long does the wood need to dry before it’s ready for sanding?
The amount of time that wood needs to dry before it can be sanded depends on several factors, such as the type of wood, the environment in which it was cut, and the thickness of the boards.
Thicker pieces will take longer to dry than thinner ones, so it’s vital to factor that into your drying time. Woods such as willow or pine can be great options if you’re looking for fast drying times, and they are usually ready to be sanded within a week.
Other factors to consider are the moisture content in it, weather conditions of the environment, and exposure to rain.
How To Properly Sand Wood?
Proper sanding produces a high-quality finished wood product but it’s crucial to have the right tools and follow the correct steps to achieve the best results. Before you begin, you need to gather your sanding tools.
Here is a list of the essential items you need:
1. Sander
A sander is a power tool used in the sanding process. It typically consists of a power switch, a palm grip, and a sanding pad that rotates, allowing the user to sand the wood with ease. Several types of sanders can be used for woodworking projects including disc sanders, orbital sanders, belt sanders, and finishing sanders.
2. Sanding Block
Utilizing a sanding block is beneficial and helps to achieve even pressure when sanding. They are great for getting into tight corners or working on intricate details. Sanding blocks are also useful in achieving a consistent finish over large areas of a wood surface.
3. Safety Glasses
Wearing safety eyewear can help you guard against any potential harm to your eyes caused by wood chips and dust particles.
4. Respirator
Sanding generates a lot of dust, so it’s important to protect your respiratory system by wearing a respirator.
5. Sandpaper
Choose the grit of sandpaper based on the condition of the wood and the desired finish. Coarser grits are great for removing rough or uneven surfaces, while finer grits are better for achieving a smooth finish.
Choosing the right sandpaper grit
When selecting sandpaper for woodworking projects, it is important to pick the right grit. Sandpaper grit is determined by the size of the abrasive material it contains. A lower number means a coarser texture and a higher number indicates a finer texture. Here are some general guidelines for choosing the right grit:
- Extra coarse grits (24 to 40) are excellent for quickening the removal of materials.
- Coarse grits (60 to 80) are good for removing rough or uneven surfaces rapidly.
- Medium grits (such as 100 to 150) are good for general sanding and smoothing.
- Fine grits (180 to 220) prepare surfaces for ultra-fine grit sanding.
- Ultrafine grits (320) are perfect for final sanding and achieving a silky-smooth texture.
Preparing The Wood Surface For Finishing
Now that you have your tools, it’s time to start sanding.
Start with sandpaper of a lower grit level. Remember to sand in the direction of the wood grain for a scratch-free finish. Once you’ve completed that, use medium grit paper to make it smoother.
Finally, continue sanding with progressively finer grits until you achieve the desired level of smoothness. Depending on the state of the wood, multiple passes with varying grits might be necessary to get the desired effect.
When you are done sanding, dust the wood surface to remove any excess wood dust that may have accumulated during the sanding process. Failure to do so can leave a hideous finish, as the dust particles can become embedded in the varnish.
The next step in the process is to apply the varnish.
Essential Sanding Techniques
The following are a few techniques to keep in mind:
- Sand with the grain: For superior results, go with the grain of the wood when sanding. Sanding against it can produce scratches and an uneven finish, whereas sanding with the grain will give you a smooth, professional outcome.
- Sand with light pressure: You should use a light touch while sanding to prevent digging into the wood or tearing up the sandpaper. Exerting too much pressure can leave unsightly scratches on your wood.
- Use a sanding block for a flat surface: The block spreads out the sanding pressure, resulting in a more uniform and level flat surface.
- Get no-clog sandpaper for wet wood: No-clog sandpaper is designed to resist clogging with wood dust and other debris when sanding wood.
What are the Alternatives To Sanding Wet Wood?
Sanding wet wood is a surefire way to wreck your project and your equipment. However, if you are desperate to get started, you could try these less effective alternatives:
1. Using a Card Scraper
If you’re dealing with wet wood that needs to be leveled or smoothened, a card scraper can come in very handy. Be sure to apply light pressure and hold the scraper at the correct angle to avoid digging into the wood. Wet wood can be tricky to work with and a card scraper could worsen the condition of the wood.
It’s worth noting, however, that a card scraper is not a substitute for properly drying the wood before sanding.
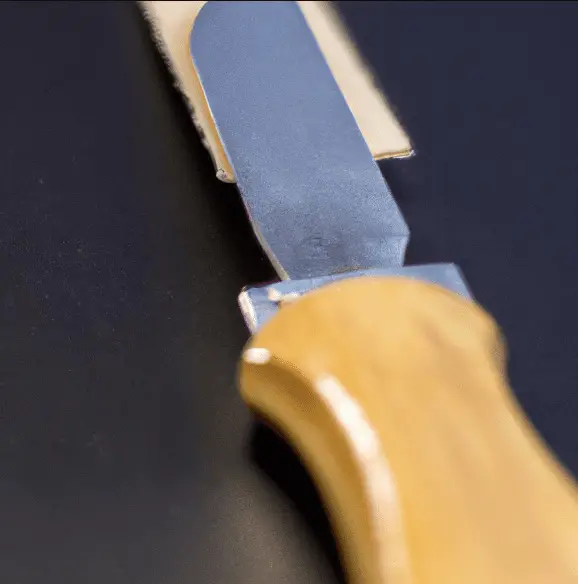
2. Hand Plane

Using a hand plane is another option for smoothing wet wood surfaces. As opposed to card paper, a hand plane is used to level rough fibers from any wooden surface without the need for sandpaper.
A hand plane on wet wood can have several negative effects. It can damage the wood itself and could exacerbate splitting. Also, the blade may become dull more quickly and be prone to rusting due to the moisture in the wood.
Conclusion
As a final thought, sanding wood that is wet is not an advisable option. Although it might be tempting to take a shortcut by skipping drying, the moisture present in wood may cause the grains to become raised and may affect your tools. This can result in a substandard outcome which will require additional work later on.
Save yourself the frustration and let the wood dry out before you even think about using sandpaper. Letting the wood dry completely before you start sanding is the ideal approach.
If time is an issue, you could use an oven to speed up the drying process, however, make sure it doesn’t dry out too quickly to avoid any splitting or cracking of the material.