Staining wood is the process of enhancing the natural beauty of wood surfaces with pigmented or colored solutions.
Wood is an incredibly versatile and attractive material but even the most beautiful wood grain can benefit from staining.
If you’re looking for something bold and vivid or something subtle and subdued, staining is the perfect way to get the desired effect. You can adjust the intensity of your stain to create your own statement piece that reflects your personal style.
Not only does staining improve the visual appeal of wood surfaces but it also adds an extra layer of protection; shielding the wood from the elements and ensuring it lasts for years.
In this article, we’ll take you through the step-by-step process of how to stain wood, including preparation, application, and finishing.
Choosing The Right Stain & Tools
Before you begin staining your wood surface, consider the color and type of stain you want to use as well as the tools and materials you’ll need to get the job done right.
Color of Wood Stains
The color of wood stains can vary. Some stains are designed to enhance the natural colour of the wood while others are meant to change the color significantly. Common colors for wood stains include:
- Weathered Oak
- Cherry
- Red Mahogany
- Dark Walnut
- Colonial Maple
- Classic Grey
Keep in mind that the color of the stain can look different on different types of wood and may also be affected by the wood’s natural grain pattern.
The grain found in wood reacts differently to stains and allows for certain areas to become darker than others. As the stain is absorbed in different levels & depths, this creates a unique effect.
Various Types of Wood Stains
1. Oil-Based Stains
These stains are known for their durability and deep penetration into the wood resulting in a rich finish.
They are ideal for outdoor projects and provide long-lasting protection against the elements.
Oil-based stains are the top choice among most woodworkers as they are usually very easy to use and can provide amazing results. These stains penetrate deep into the wood and give it a unique texture plus gorgeous color.
2. Water-Based Stains
Water-based stains are easy to use and clean up with soap and water so they are a great choice for beginners. They also dry quickly and emit fewer fumes than oil-based stains. When dealing with new wood, it’s best practice to use water-based stains.
One of the major advantages of water-based stain is that it has no unpleasant odor or dangerous fumes so it’s much safer to use.
Since it is not flammable, you can rest assured that your workplace will always remain hazard-free.
Additionally, because this type of stain is breathable, you’ll get a much cleaner and more even finish because it lets water vapor evaporate.
3. Gel Stains
Gel stains and traditional stains differ in the way they bind to wood. Gel stains create a coating on the surface of the wood, rather than being absorbed into it – allowing some of its unique features to be visible while delivering an even finish.
Traditional stain alternatively soaks into the wood. Gel stains bring out subtle markings in the wood that can transform it into something truly special.
It is great for species of wood such as maple and cherry which can turn blotched after being stained.
Tools & Materials Needed For Staining Wood
1. Sandpaper
Choose a grit that is appropriate for your project, typically ranging from 120-grit to 220-grit. You’ll also need a sanding block or orbital sander to ensure a smooth and even surface.
2. Conditioner
A conditioner is a pre-stain treatment that helps the wood absorb stains more evenly. It is particularly useful when staining softwoods or uneven-grained woods as these types of wood tend to absorb stains unevenly and often cause blotches.
Wood conditioners are available in both oil-based and water-based formulas, and they can be applied with a brush or a dry hand cloth.
3. Brushes
Use a high-quality natural-bristled brush for oil-based stains and a synthetic brush for water-based stains. For gel stains, a foam brush or cotton rag works well.
4. Cloths
Use a clean & lint-free cloth for wiping down the surface and applying the stain.
5. Protective Gear
Always wear gloves and eye protection when working with stains and use a respirator mask when working in a poorly ventilated area.
6. Stain
Choose the appropriate type and color of stain for your project based on the type of wood and desired finish.
Complete Steps By Step Process To Stain Wood
Step 1: Preparing the Wood Surface
Prior to staining your wood surface, it is vital to prepare it for the stain to be absorbed accurately and properly.
Preparing the wood surface is crucial for achieving a smooth and even finish. Skipping this step can result in uneven coloring, blotchiness, and other imperfections.
Instructions For Preparing the Wood Surface
1. Sanding:
Use a sanding block or orbital sander with the appropriate grit sandpaper to smooth out any rough spots or imperfections on the wood surface.
Start with a lower grit (such as 120 grit) and work your way up to a higher grit (such as 220 grit) for a smooth finish.

For a smooth finish, the 120-grit sandpaper is great for removing any dirt or debris which may have left imperfections on the wood surface. Further refinement can be attained by using 220-grit sandpaper. Ensure you always sand going in the direction of the grain for an even better result.
Sanding wood that has already been stained begins with sandpaper of medium grit to extract most of the stain’s color. From there, incrementally finer grits should be used to reach the desired effect.
2. Cleaning:

Wipe down the wood surface with a clean, damp cloth to remove any dust or debris from the surface. Let it dry completely before moving on to the next step. For stubborn stains or grease, use a wood cleaner specifically designed for the type of wood you’re working with.
3. Conditioning:

You should apply a wood conditioner to the surface before staining, as it will make sure the wood takes on the stain uniformly.
Conditioners are great for avoiding discoloration or blotchiness when staining wood. They work by penetrating the wood fibers and sealing off pores that would otherwise absorb more stains than others.
To use a wood conditioner, apply it to the surface with a clean cloth or brush and let it soak in for 5-15 minutes before wiping away any excess. Follow the manufacturer’s instructions for the best results.
When selecting stains, finishes, and conditioners for your woodwork, ensure they are compatible.
It is best to use the same base – for example, a water-based stain has to be used in conjunction with a water-based conditioner and finish and an oil-based stain would need to be paired with an oil-based conditioner and finish.
Step 2: Applying The Stain
After completing the appropriate surface preparation, now you can move on to staining. Here’s what you need to remember:
Different Stain Applicators For Applying The Stain
There are multiple techniques for applying wood stains on wood; the most standard methods involve using a brush, lint-free rag, roller, or sprayer.
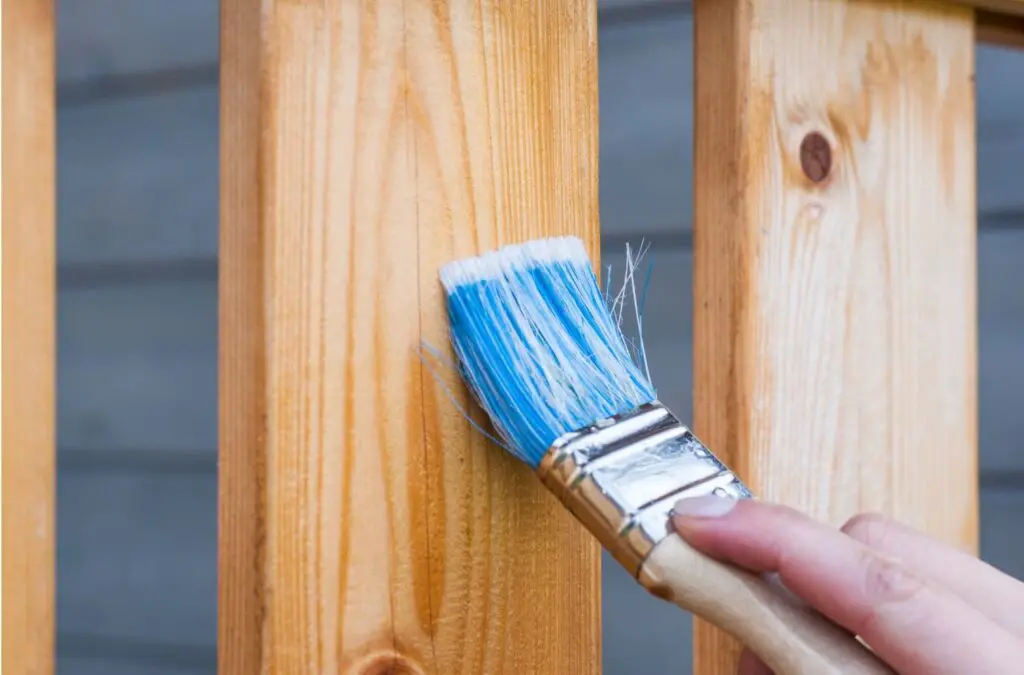
1. Brush

A brush is the most traditional way of applying wood stain and it offers more control over the outcome. There are a few kinds of brushes used for this purpose like:
- Synthetic Bristle Brush: Synthetic materials like nylon or polyester are used to make these brushes which work excellently with water-based stains and are also simpler to clean compared to natural bristle brushes.
- Natural Bristle Brush: Natural-bristled brushes are a great option when working with oil-based stains as they provide an even or polished finish. These brushes are often made from animal hair like boar or horse hair.
- Foam Brush: Foam brushes can greatly help while staining and polyurethane-ing hard-to-reach areas such as corners and crevices.
Pros: Brushes are an ideal choice for applying stain or finish as they provide better coverage with less waste than other applicable tools. These tools are also cost-effective and easily accessible in most places.
Cons: If not administered carefully, brush strokes may be apparent on the surface. The application of stain using a brush needs to be done cautiously to achieve professional results. Staining a large area can be time-consuming and labor-intensive.
2. Lint-Free Rag

To get the most out of a wood stain, use a lint-free cloth. This way, you control just how much stain is applied as well as make sure any excess stain is removed effectively.
- Look for rags made specifically for staining as they are lint-free and will not leave any fibres behind
- To make the job easier, chop your rag into manageable parts to help you spread the paint more accurately and prevent any unwanted mess
- Soak the cloth in the stain and carefully wipe it along with the wood grain. Quickly & steadily swipe it across to avoid any streaks or blotches
- Take a fresh part of the cloth and use it to wipe off any excess stain
- After you have completed your task, ensure you dispose of the rag correctly
Pros: Using rags is a great way to quickly cover flat surfaces and can help avoid visible brush strokes. It can also be relatively inexpensive which makes it an even more attractive option.
Cons: Using a rag can be messy; the stain can easily get on your hands or drip onto the floor or other surfaces.
3. Roller

Compared to a brush or rag, they cover more ground in a shorter time period, saving you energy and time.
Rollers are especially useful for large surfaces such as floors or walls where a brush or a rag may not be as efficient.
Foam rollers are the go-to choice when it comes to applying stains. They are highly absorbent and can effectively soak up a lot of product.
Pros: Using a roller is less messy than using a brush or a rag as it prevents drips and spills.
Cons: Rollers absorb a lot of stains which may lead to waste if you’re not careful. Cleaning a roller can be more difficult than cleaning a brush or a rag because the fibers get clogged with stains.
4. Paint Sprayer

Paint sprayers are the ideal choice for staining large surfaces quickly. With a few hours of work, you could stain an entire area without any hassle.
HVLP spraying is the ideal way to apply stains as it distributes an even layer; other types of spray systems can be used but won’t give you the same smooth results.
Pros: Using a spray gun allows for fast and even application of the stain, especially for large surfaces. It is also useful for hard-to-reach areas.
Cons: Sprayers are expensive and require proper ventilation to avoid inhaling harmful fumes.
Instructions For Applying The Stain
1. Stir the Stain:
Be sure to blend the paint stain correctly with a stir stick before applying it to the wood. Put on gloves to avoid staining your hands.
2. Apply the Stain:
Using your preferred method (brush, cloth, or spray gun), apply the stain in long, even strokes, working in the direction of the wood grain. Be sure to apply a thin, even coat and avoid over-applying, which can lead to drips and blotches.
3. Wipe Away Excess:
After applying the stain, use a clean cloth to wipe away any excess to ensure an even coat. This step is essential for achieving a smooth, consistent finish.
Leaving a stain on the wood for too long can cause it to darken unevenly, so you should act quickly and use a soft, clean cloth to remove any excess. Blot the affected area lightly, moving in a direction that follows the grain of the wood.
4. Allow to Dry:
Allow the stain to sit undisturbed for 4 hours before giving it another coat of stain. Repeat the steps as much as necessary until you have the color shade you want.
Tips for Ensuring an Even Coat & Avoiding Drips or Blotches
- Apply the stain in thin, even coats. Avoid over-applying
- Work in small sections to ensure a consistent finish
- To avoid having any problems, use the same brand & type of stain throughout the entire job. Using more than one brand or type of stain in between your project can lead to unexpected issues
- Check for drips or blotches frequently and wipe them away. Use a clean cloth to wipe away excess stains
- Applying several thin layers of stain is recommended over a singular, dark application; this helps in preventing overlap marks
Step 3: Finishing The Wood: Protecting & Enhancing the Beauty
While staining wood is important for achieving the desired aesthetic, it does not provide enough protection. To really bring out the beauty and preserve it for a long time, you should follow up with a finishing coat.
Applying a finish to wood is a great way to protect it from potential damage caused by exposure to moisture, scratches, and UV rays.
It can also improve the look of your wooden furniture by bringing out its natural color and grain.
Without a finish, your furniture may appear dull or boring and lose some of its value but with a good finish, you can add longevity and value to your investment.
There are numerous kinds of clear finishes to choose from which include some of the most popular kinds like:
1. Penetrating Oils
They penetrate deeply into the pores of the wood and provide a durable, water-resistant finish.
- Tung oil: Tung oil is a popular choice for finishing wood because it penetrates into the wood. Applying tung oil onto a wood surface is an effective way of protecting it from water, abrasions, and mildew. It offers a layer of protection beyond what you would get with just a wood stain.
- Danish oil: Danish oil is a wonderful combination of natural oils and resins, which penetrate deeply into the surface of the wood. Once applied, it serves as a remarkable topcoat over any stained piece of wood, offering dependable protection and an excellent finish.
2. Surface Finish
Applying a surface finish on wooden materials can form a protective coating that will harden and shield them from external factors.
- Varnish: Varnish is a liquid coating that adds protection to wood surfaces like floors or furniture. It may be clear or pigmented and is exceptionally helpful in increasing the durability of the woodwork.
- Polyurethane: Polyurethane is similar to varnish in that it creates a hard, durable surface. However, it is less flexible than varnish – it may not be a good choice for wood that will be moved a lot.
- Shellac: Shellac finish, or French polish, is a classical method of protecting wooden furniture that has been used for generations. It’s still commonly used today as it brings out the beauty and texture of the wood in a way that modern materials cannot match.
Applying The Finish
Once you’ve chosen your finish, it’s time to apply it to the wood. Here are some instructions to ensure a successful application:
- Apply the First Coat: Use a brush, roller, or spray gun to apply a thin layer of the protective coat. Make sure you spread it evenly and don’t forget any area to ensure complete protection for your wood.
- Sand Again: After the first coat has dried, wait for about 4 hours before lightly sanding the surface with fine-grit sandpaper to remove the top layer. Be sure to remove all dust before applying the second coat.
- Apply Additional Coats: Apply as many additional coats as needed to achieve the desired level of protection and sheen. Allow each coat to dry completely before sanding and applying the next. A common practice is applying just two coats of finish. Let the wood rest for a few days so that it can dry out completely before use.
To Wrap it Up
Staining wood is a satisfying and rewarding project that can enhance the look of your furniture, flooring, or other wood surfaces.
It’s important to prepare the wood surface properly, choose the right stain and tools, apply the stain evenly, and finish the wood to protect it and bring out its natural beauty.
By following the steps outlined in this article, you’ll be able to stain wood like a pro in no time.
Don’t be afraid to experiment with different techniques and finishes to achieve the desired look.
Remember, practice makes perfect! And if you need more guidance or inspiration, there are tons of resources available online and at your local hardware store to help you become a staining pro in no time!