Sandblasting is a powerful process that transforms wood surfaces from dull and worn to smooth and new-looking. It involves the use of abrasive materials to remove layers of paint, varnish, or other coatings from wood surfaces – exposing the natural wood grain and restoring its beauty.
Sandblasting is common for woodworkers who seek to restore their wood projects and make them look brand new. With its capacity to efficiently take off even the toughest residues, it has proven highly beneficial. This detailed guide will walk you through everything you need to know about sandblasting wood – from the advantages to the different types of material used to sandblast wood.
What is Sandblasting?
Also known as abrasive blasting, sandblasting is a process of cleaning, smoothing, or scratching surfaces using a high-pressure stream of abrasive materials such as sand or glass beads. The abrasive material is propelled by compressed air which sprays it onto the surface to be treated while removing unwanted coatings or preparing the surface for a new finish.
Sandblasting is a practicable solution to surface treatment and is used on various surfaces including metals and wood.
Is it Possible to Use Sandblasting as an Alternative to Sanding?
Sandblasting is often a more efficient means of removing coatings and making wood surfaces ready for refinishing when compared to traditional sanding techniques. The process is especially useful for restoring old or weathered wood surfaces as it removes even the most stubborn stains and finishes without damaging the natural wood grain. However, note that sandblasting is a more aggressive process than sanding and can potentially damage the wood if not done with care. So, using the appropriate sandblasting media and techniques for your specific wood surface to achieve the desired outcome is essential.
Here are some of the Advantages of Sandblasting wood compared to sanding:
- Sandblasting can be faster and more efficient than sanding, especially for larger surfaces or tough coatings
- Sandblasting creates a unique and textured finish on the wood surface that may not be achievable with sanding
- It can remove even the most stubborn stains and finishes without damaging the natural wood grain
Also, consider some of the Disadvantages of Sandblasting:
- Sandblasting is more expensive than sanding because it requires specialized equipment and materials
- The process creates a lot of dust and debris which can be messy and potentially harmful if proper safety precautions are not taken
- It is a more intensive procedure than sanding and if not carried out properly can cause harm to wood
Benefits of Sandblasting Wood
Sandblasting wood offers many advantages compared to other surface preparation methods. A few key benefits include:
Efficient Surface Preparation
Sandblasting is a highly efficient method for preparing wood surfaces for new finishes. Unlike sanding which can be a time-consuming and labour-intensive process, sandblasting can remove layers of coatings from wood surfaces quickly and effectively.
By propelling fine sand or other abrasive materials at high speeds onto the surface being cleaned, sandblasting quickly and thoroughly removes unwanted paint or finish, leaving behind a clean and smooth surface. Compared to other methods such as scraping, sandblasting saves significant time, especially when dealing with large or complex surfaces.
Preservation of Natural Wood Grain
When sanding wood, there’s always a risk of damaging the natural wood grain if the surface is uneven or has intricate details. In contrast, sandblasting offers a great way to eliminate unwanted coatings without harming the wood’s original grain, texture, and character.
Removal of Tough Stains and Coatings
Sandblasting is a powerful, reliable way to eliminate difficult stains & coatings from all types of wooden surfaces – like old graffiti or aged finishes. It can even remove deeply embedded dirt and grime that cannot be removed through sanding.
Creation of Unique Textured Finishes
Sandblasting can create textured finishes on wood surfaces like a rustic or glossy look. This can add a unique and personalized touch to your woodworking projects.
Rustic Look: It offers a vintage and rustic look to wooden items that give them an edgy character. With different media types, sandblasting pressure settings, and the ability to customize the look you want, it’s easy to create finished pieces that reflect your own unique rustic style.
Glaze-like Appearance: Depending on the type of media used, sandblasting also gives wood surfaces a smooth and polished appearance. This enhances the overall aesthetics of your projects and makes them stand out.
Restoration of Weather-Beaten Wood Surfaces
Over time, exposure to the elements such as sun, wind, rain, and temperature fluctuations may cause wood surfaces to become weathered, faded, and damaged. Sandblasting helps remove the weathered layer of the wood to reveal a fresh, clean surface underneath.
However, when it comes to restoring antique furniture, be cautious and use appropriate methods that will not damage or harm the integrity of the piece.
Pore Closing
Sandblasting can also help protect wood surfaces from moisture damage by closing the wood pores. When the fibres are pushed back into the wood, they form a tight seal that can prevent moisture from penetrating the surface and causing damage. This extends the life of your wood items and keeps them looking great for years.
Basic Equipment and Materials Needed to Sandblast Wood
Sandblasting helps with the initial process of restoring furniture by removing stains & build-up from the wood. If you’re looking to try this method out, here’s what you’ll need:
Sandblasting Machine:
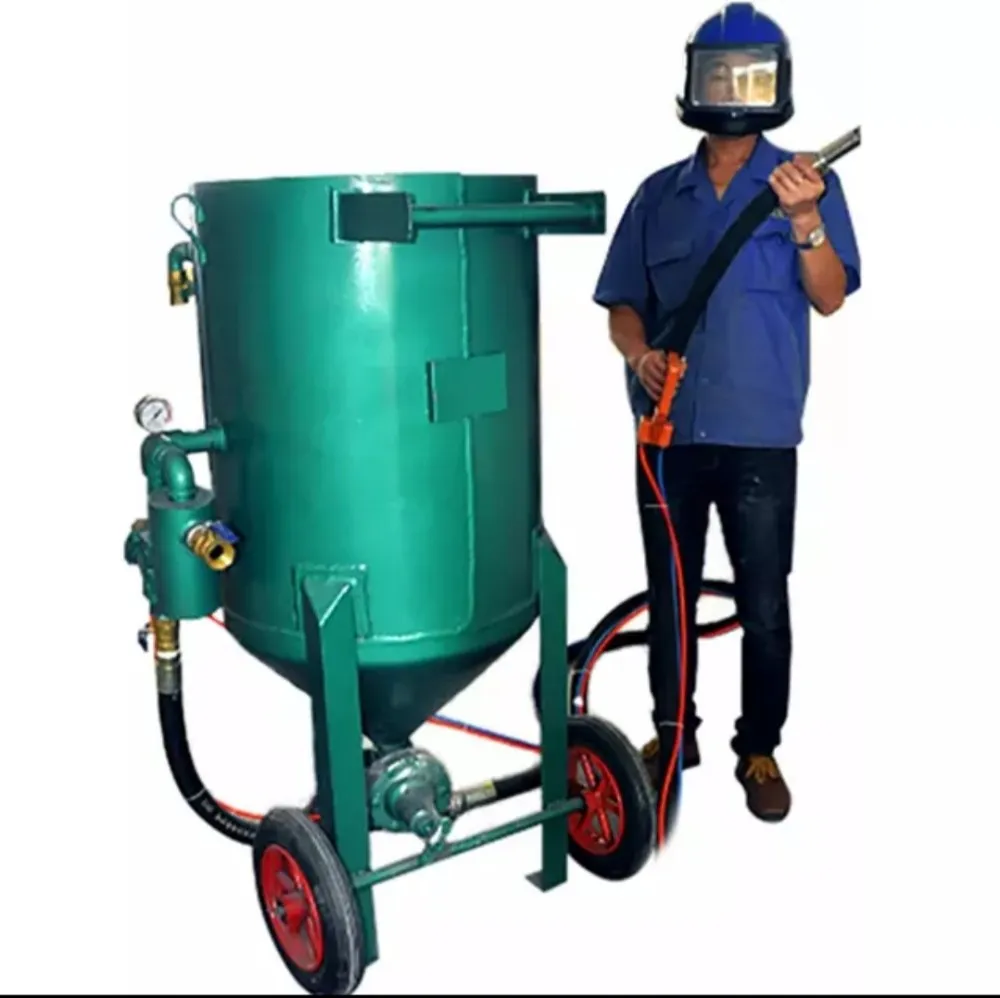
This is the main piece of equipment used for sandblasting; it is essentially a compressor that pumps high-pressure air and abrasive material through a hose and nozzle to the surface being treated.
Air Compressor:
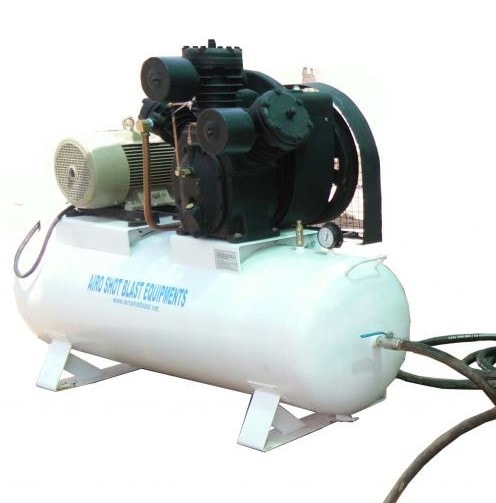
An air compressor is necessary to supply compressed air to the sandblasting equipment. For smaller sandblasting projects, an air compressor with a 10CFM to 20CFM output is recommended. For bigger tasks that require more power, opt for a compressor with an output of 18CFM to 35CFM. Industrial-level sandblasting requires an even higher output of 50CFM to 100CFM.
Abrasive Media:
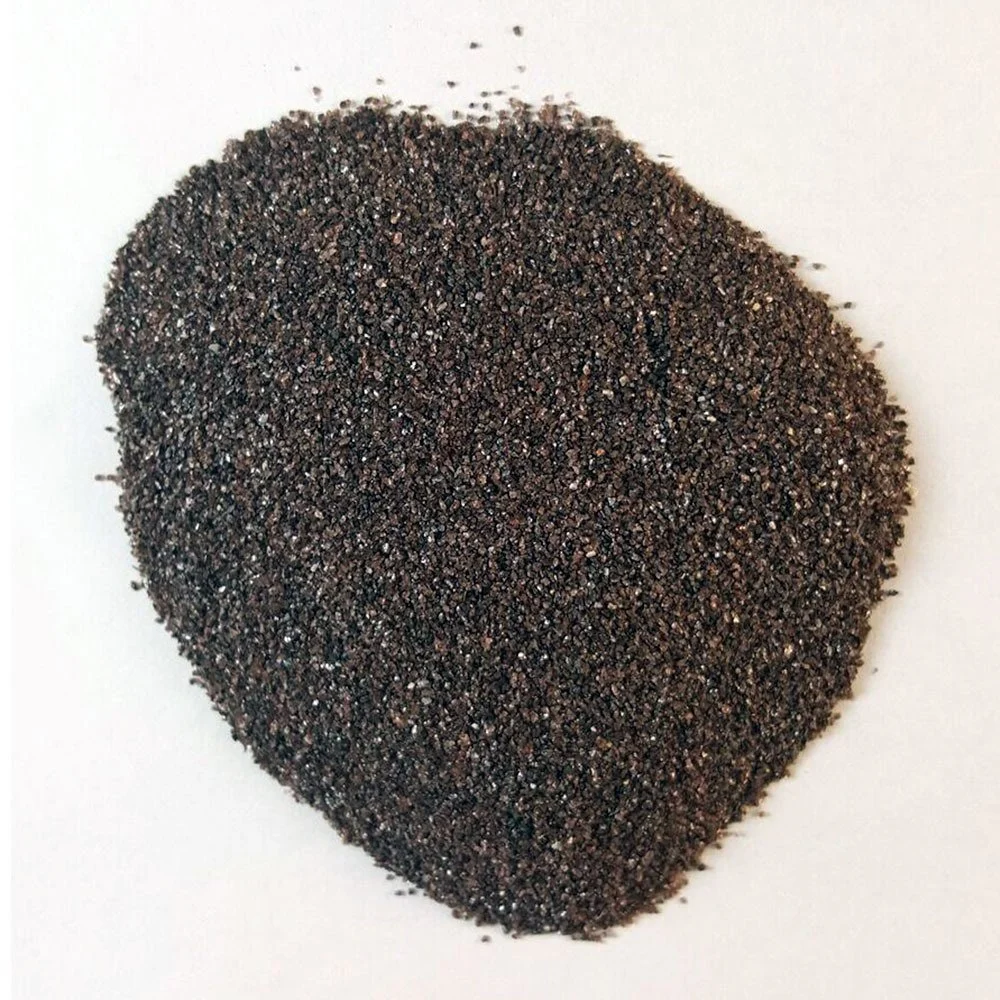
This is the material that is used to blast the surface being treated. Aluminum Oxide is the go-to abrasive for blast finishing and surface preparation. It is widely used due to its effectiveness and ease of use.
Nozzle:
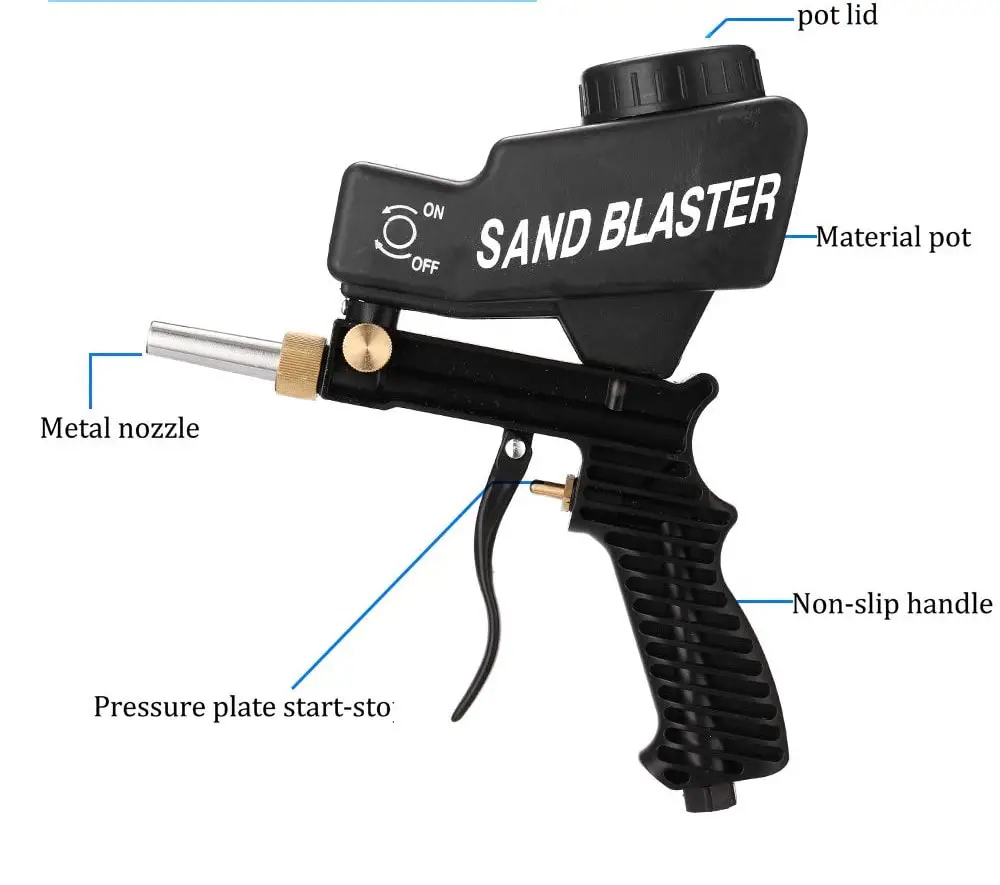
The sandblasting nozzle is an essential component of sandblasting equipment. Sandblasting nozzles generally use four types of materials which are ceramic, boron carbide, silicon carbide, and tungsten carbide. Ceramic nozzles are ideal when dealing with soft media like soda but they might not stand up to the tougher varieties as they tend to get damaged faster.

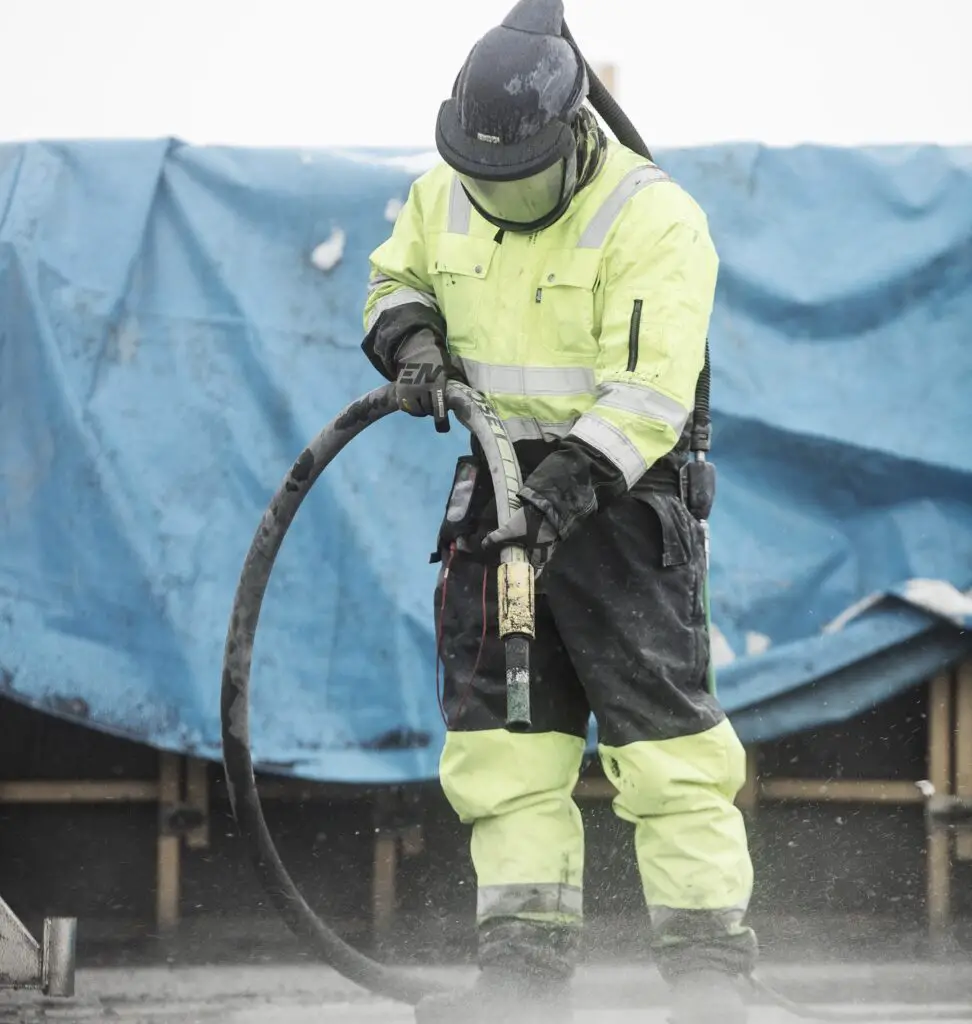
Protective Gear:
It’s important to wear the right protective gear like goggles, respirators, protective clothing, and gloves when sandblasting – all of which are designed to protect you from dust, debris, and any potential harm.
Choosing the Right Sandblasting Machine for Your Project
There are several types of sandblasters available. Some common types of sandblasting machines are:
Gravity-Fed Sandblasters
The gravity-fed sandblaster is an easy-to-use solution that ensures a stable and optimal flow of abrasives. This makes it ideal for paint removal and etching or scratching tasks. Setting up the unit is also hassle-free. They are typically smaller and more portable than other types of sandblasting machines so they are suitable for smaller projects.
Siphon Sandblasters
These machines use a siphon system to draw abrasive media into the sandblasting gun. They are typically larger and more powerful than gravity-fed sandblasters.
Siphon sandblasters provide comparable power to gravity-fed abrasive blasters and function much longer with fewer refills. However, they are bigger in size and more expensive.
Pressure Sandblasters
Pressure sandblasters use a metal drum to hold and pressurize the abrasive media before feeding it into the sandblasting gun. When activated, the built-up pressure pushes the media out through the hose. A sandblaster tank is pressurized thereby enabling it to blast abrasives at an extremely rapid rate – usually around 120 psi.
They are more efficient and powerful than other types of sandblasting machines so they can be used for heavy-duty industrial projects.
What to Consider When Choosing a Sandblaster
Picking the perfect sandblaster for your task is a critical call to make. It’s essential to take into consideration aspects such as:
Project Size
The scale of the work should be taken into account when picking the right sandblaster. A tiny task may only require a basic gravity-feed sandblaster while a larger project will involve a more powerful pressure pot sandblaster.
Gravity-fed sandblasters come with a limited reservoir usually ranging from 20 to 25 ounces whereas a pressure or siphon sandblaster has the capacity to hold up to 50 lbs of abrasive material.
Air Pressure and CFM Requirements
When choosing a sandblaster, air pressure & CFM (cubic feet per minute) should be given due importance. The higher the pressure and CFM, the more powerful the sandblaster should be. However, you’ll need to ensure that your air compressor can provide the necessary air pressure and CFM to power the sandblaster.
Safety Precautions
Sandblasting can be hazardous if proper safety precautions are not taken. Make sure to wear protective clothing such as a blast hood and safety goggles. Work in a well-ventilated area to minimize the risk of inhaling abrasive media particles.
Budget
Consider your budget when selecting a sandblaster. While a high-end sandblaster may provide superior performance, it may not be necessary for your project. Give thought to your specific needs and the frequency of use to determine the appropriate level of investment.
Blasting Media Grit Size
Each sandblaster is designed to work with specific types of sandblasting media; not all blasting media may be suitable for use with all sandblasters. Since different types of sandblasting machines have different specifications and limitations, using the wrong type of blasting media can damage the equipment and affect the quality of the finished product.
Some sandblasters may have restrictions on the size or shape of the blasting media that can be used. Before getting a sandblasting machine, it’s highly recommended to review its blasting-media-grit-size rating.
Types of Sandblasting Media
Depending on the task at hand, specific sandblasting media are used for the sandblasting process. Examples of these materials include:
- Aluminium oxide
- Corn cob
- Crushed glass
- Dry ice
- Glass beads
- Plastics
- Sand
- Silicon dioxide
- Silicon carbide
- Soda
- Staurolite
- Steel grit
- Steel shot
- Walnut shells
Setting up the Work Area
Abrasive materials used for sandblasting are highly dangerous and can cause serious skin/eye injuries if not handled with great care. Moreover, the created dust from this process is hazardous to breathe in and can lead to respiratory diseases.
To ensure that sandblasting is done safely, prepare your workshop or blasting area properly. Below are some steps to take before you begin sandblasting:
Cleared Workspace: Clear your workspace of any unnecessary items or debris that could get in the way or become airborne during the sandblasting process. Cover nearby surfaces with tarps or plastic sheets to protect them from dust and debris.
Ventilation: Ensure that your workshop is well-ventilated to prevent the buildup of dust and other airborne particles. Use exhaust fans or open windows to ensure that fresh air is circulating in the area.
Personal Protective Equipment: Always wear personal protective equipment (PPE) when sandblasting. This includes a respirator to protect against dust inhalation, safety glasses or goggles to protect your eyes, and gloves to protect your hands.
Lighting: Illuminate your workspace thoroughly to protect yourself from any mishaps. Properly lit spaces will improve accuracy and help you clearly identify the surface being blasted.
Proper Equipment: To ensure a successful sandblasting job is done, it is essential to have the right tools and equipment; this includes an air compressor of good quality, an appropriate abrasive material, and a blasting nozzle.
Before conducting sandblasting, ensure that anybody involved in the process is adequately trained on how to use the equipment and is aware of the pertinent dangers as well as safety measures.
How to Sandblast Wood
If you’re new to sandblasting, here’s a step-by-step guide to help you achieve the best results.
Step 1: Select the Sandblasting Media
Choose the appropriate sandblasting media for the type of wood you want to sandblast. The abrasive power of the sandblasting media will determine how quickly and effectively it removes the material from the wood surface. Fine-grit sandblasting media is usually used for delicate or thin wood while coarse-grit media may be used for harder woods.
Always test the chosen sandblasting media on a small area of the wood first to ensure optimal results.
Step 2: Load the Tank
The next step in the sandblasting process for wooden surfaces is to carefully fill the pressure pot or tank with the right amount of abrasive sandblasting media.
Overloading the sandblasting equipment with media or using incorrect pressure may lead to ineffective sandblasting as well as potential equipment damage or safety hazards.
Step 3: Install the Nozzle
To install the nozzle, first, ensure that the sandblasting equipment is turned off. Then, carefully attach the nozzle to the gun or wand. The size of the nozzle should be appropriate for the media you’re using and the pressure you’ll be working with. A nozzle that is too small will clog easily while a nozzle that is too large will waste media.
For softer media, attach a 3/32-inch nozzle to the gun but if you plan on using a more coarse abrasive material, a 1/8-inch nozzle should be installed instead.
Periodically inspect the nozzle during the sandblasting process to ensure that it is clean and free from clogs or obstructions. Clogs in the nozzle can cause uneven sandblasting and damage to the wood surface.
Step 4: Set up the Equipment
Start by turning on the air compressor and allowing it to build up pressure. The pressure needed may vary so it’s important to refer to the manufacturer’s instructions. Once the compressor has built up sufficient pressure, adjust the pressure regulator to the recommended level. For wood surfaces, a pressure of around 35 psi is a good starting point.
Perform a test with the sandblasting gun on a piece of scrap wood before carrying out the process on your wooden furniture to ensure that the pressure is appropriate. This will also help you determine if any adjustments need to be made to the pressure or nozzle settings.
Step 5: Adjust as Needed
If the sandblasting isn’t creating the desired impact, it’s time to make some tweaks. Consider changing to a more abrasive media. Once the new media is loaded, test the gun again on a piece of scrap wood to see if it is effective in achieving the desired sandblasting impact.
Further adjustments may be needed if the media is still not abrasive enough. It would be necessary to increase the output pressure in increments of 10 psi. After each increase in pressure, test the gun to evaluate the results.
Step 6: Sandblast the Surface
Hold the gun a few inches away from the wood surface and start sandblasting. Keep the nozzle moving in a circular or back-and-forth motion to ensure even sandblasting coverage. Avoid focusing your gun in one spot while working on the wood. This can cause over-sanding and damage to the wood. Keep the gun or wand in constant motion.
Regular assessments will help you track your progress and ensure that you are getting the desired results.
Step 7: Clean the Work Area
After you’ve finished sandblasting, clean up the work area thoroughly. Dispose of the used sandblasting media and any debris from the wood surface appropriately. The material must be collected and disposed of or recycled. To ensure the effective recycling of abrasive materials for blasting, it is important to store them in a closed-off area. Don’t forget to clean and store your sandblasting equipment properly to ensure its longevity.
Key Takeaways
- Sandblasting can be used on a variety of wood furniture, including tables, chairs, cabinets, and more
- Proper surface preparation, equipment selection, and safety gear are critical for successful sandblasting
- Different types of sandblasting media can be used to achieve different finishes and effects
- Maintain a continuous, deliberate pattern when sandblasting to achieve an even finish
- Achieving a smooth and even wood surface may require multiple passes with different sandblasting media and pressure settings
- After sandblasting, thoroughly clean the work area and dispose of used sandblasting media properly