If you’ve worked with polyurethane, you know how important it is to achieve a smooth finish. That’s why thinning polyurethane for spraying is key.
In this post, we’ll explore why it’s crucial and provide valuable tips for achieving professional results.
Let’s get started!
Understanding Polyurethane
Polyurethane is a popular and versatile material used as a finish for various surfaces. It’s a protective coating that enhances the appearance and durability of materials like wood, metal, and plastic.
Polyurethane provides a tough and long-lasting layer that resists scratches, moisture, and UV damage. It comes in different forms, such as liquid or aerosol, and can be applied using various methods, including brushing, wiping, or spraying.
Why You Should Thin Polyurethane For Spraying?
So, you might be wondering, why bother thinning polyurethane when you can just slap it on straight from the can? Well, let me tell you why it’s a game-changer for spraying.
Smooth and Even Finish: Thinning polyurethane helps you achieve a smooth and even finish on your surface. It reduces the viscosity of the polyurethane, making it easier to spray evenly without leaving unsightly streaks or brush marks behind.
- Better Coverage: Thinned polyurethane has improved flow and atomization, allowing it to spread more evenly over the surface. This means better coverage with fewer coats, saving you time and effort.
- Professional Results: Whether you’re a DIY enthusiast or a pro, thinning polyurethane can take your project to the next level. It gives your finish a more professional and polished look, making your hard work truly stand out.
- Compatibility with Spraying Equipment: Many spraying systems work best with thinned polyurethane. By adjusting the viscosity, you ensure that the polyurethane flows smoothly through the spray gun, preventing clogs and providing consistent spray patterns.
So, if you want that flawless, professional-looking finish, don’t skip the step of thinning your polyurethane for spraying. It’s a small effort that goes a long way in achieving outstanding results for your project.
Step-By-Step Guide on Polyurethane Thinning
- Select the appropriate solvent: Choose a solvent that is compatible with your specific polyurethane product. Refer to the manufacturer’s instructions or product label for the recommended solvent, such as mineral spirits, lacquer thinner, or water-based reducers.
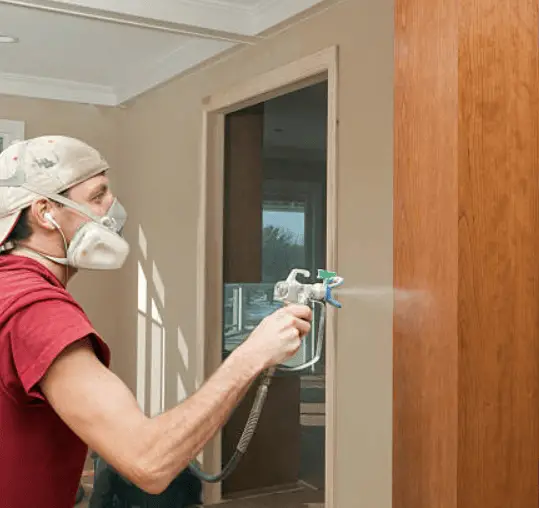
- Ensure proper ventilation: Work in a well-ventilated area or wear a respirator mask to protect yourself from solvent fumes.
- Measure and pour: Measure the desired amount of polyurethane into a clean mixing container that can withstand the solvents.
- Gradually add solvent: Slowly pour a small amount of the chosen solvent into the polyurethane while continuously stirring. Begin with a conservative ratio, like 10 parts polyurethane to 1 part solvent, and adjust as needed.
- Thoroughly mix: Stir the mixture with a stir stick or mixing paddle until it is thoroughly blended and free of lumps or clumps.
- Test the viscosity: Check the viscosity of the thinned polyurethane using a viscosity cup or by observing how it flows off a stirring stick. Adjust the ratio of polyurethane to solvent if needed to achieve the desired consistency.
- Strain the mixture: Strain the thinned polyurethane through a fine-mesh paint strainer or nylon stocking to remove any impurities that could affect the finish and cause clogs in your spraying equipment.
- Begin spraying: Once you have achieved the desired viscosity and strained the mixture, you can start spraying. Follow the instructions for your spraying equipment and apply the thinned polyurethane in even coats, overlapping each pass slightly.
Safety Precautions
Safety is crucial when working with polyurethane. It emits fumes and may contain hazardous chemicals. Following safety guidelines minimizes risks and ensures well-being.
1. Necessary Safety Equipment
Use proper safety equipment when working with polyurethane:
- Respirator Mask: Wear a mask approved for organic vapors.
- Safety Glasses: Protect your eyes with safety glasses or goggles.
- Gloves: Use chemical-resistant gloves, like nitrile gloves.
- Protective Clothing: Wear long sleeves, pants, and closed-toe shoes.
2. Proper Ventilation & Environment
Ensure proper ventilation:
- Outdoor Work: Preferably work outdoors to benefit from natural ventilation.
- Indoor Work: Open windows, use fans, or air purifiers to improve air circulation.
- Exhaust System: In enclosed spaces, use exhaust systems or ventilation hoods.
Choosing The Right Solvent
When thinning polyurethane, it’s important to select the appropriate solvent. You have different types to choose from, such as mineral spirits, lacquer thinner, or water-based reducers.
Each solvent has its characteristics and uses. It’s crucial to understand these differences and consider the compatibility with your specific polyurethane finish.
By making the right solvent choice, you can achieve the best results when thinning polyurethane for your project.
Tips & Best Practices
By below-given tips, you can effectively thin polyurethane, achieve optimal spraying results, and troubleshoot common issues.
- Ratio: Maintain the correct solvent-to-polyurethane ratio for optimal results. Gradually add solvent, testing viscosity along the way, and aim for a balanced mixture.
- Mixing: Thoroughly mix the solvent and polyurethane for a consistent blend. Remove lumps and clumps, ensuring a smooth texture before spraying.
- Spraying: Use proper techniques and equipment. Adjust spray pattern and pressure, apply even coats, and maintain a consistent distance and speed during spraying.
- Troubleshooting: Address common issues like uneven coverage or clogging. Adjust the ratio if needed, ensure ventilation, clean equipment promptly, and strain the mixture if required.
Application & Cleanup
1. Preparing the surface for polyurethane application
Before applying polyurethane, ensure that the surface is clean, dry, and free from dust or debris. Sanding the surface lightly can help promote better adhesion.
Remove any existing finishes or coatings that may interfere with the polyurethane application. Follow the manufacturer’s guidelines for surface preparation specific to your project.
2. Spraying techniques for an even finish
When spraying thinned polyurethane, use smooth and controlled movements to achieve an even finish.
Maintain a consistent distance from the surface and overlap each pass slightly to avoid streaks or uneven coverage. Take your time and apply multiple thin coats rather than one heavy coat to achieve a smoother and more durable finish.
3. Drying and curing time for thinned polyurethane
The drying and curing time for thinned polyurethane can vary depending on factors such as temperature, humidity, and the specific product used. Follow the manufacturer’s instructions regarding drying and curing times.
Allow sufficient time for the polyurethane to dry and cure completely before subjecting the surface to any stress or additional coats.
4. Cleaning up after spraying
After spraying, clean your equipment, such as the spray gun or airless sprayer, thoroughly according to the manufacturer’s instructions. Use the appropriate cleaning solvent recommended for the type of polyurethane used.
Dispose of any used solvents and materials responsibly, following local regulations and guidelines.
Additional Considerations
1. Storing Thinned Polyurethane
If you have leftover thinned polyurethane, store it in a tightly sealed container in a cool, dry place. Ensure the container is labeled with the contents and the date it was thinned. Proper storage helps maintain the quality of the polyurethane for future use.
2. Shelf Life & Reusability of Thinned Polyurethane
Thinned polyurethane has a limited shelf life. Check the product label or manufacturer’s instructions for information on the shelf life of the specific polyurethane you are using. Avoid using expired polyurethane as it may not provide the desired results. Additionally, polyurethane may not be reusable for future projects once thinned, as solvent evaporation can affect its performance.
3. Disposal of leftover Or Expired Polyurethane
Properly dispose of any leftover or expired polyurethane according to local regulations and guidelines. Contact your local waste management facility for information on the proper disposal methods. Avoid pouring polyurethane or solvents down drains or disposing of them in regular trash bins.
Conclusion
In conclusion, to thin polyurethane effectively, remember to select the appropriate solvent, maintain the correct ratio, use proper techniques, and prioritize safety.
Prepare the surface, be mindful of drying times, and ensure responsible cleanup and disposal. Following these guidelines will help you achieve excellent results when spraying polyurethane.
Happy spraying!