If you’re not content with the drab look of your wood surfaces, it’s probably time to give them a few coats of paint and make them look brand-new again.
You can get rid of the stains, restore their colors and even match them to your home decor. This can instantly revive the appearance of your furniture or other wood items.
You should be pleased to know that it is possible in most cases to recoat an existing stain without needing to take the time and effort to completely remove it. This makes it much more convenient & cost-effective.
With some knowledge and the right tools, you can give your wood surfaces a fresh new look without starting from scratch.
In this guide, we’ll dive deep into applying stain over an already stained surface, with helpful advice for achieving the best results.
What Is Stain Over Stain?
Staining over stain is exactly what it sounds like: applying a new layer of stain over an existing layer of stain, instead of removing the existing stain and beginning anew.
People love this technique as it provides room to accomplish great results in a shorter amount of time. Plus, less effort is required.
Can You Stain Over Stain?
It’s possible to completely refinish your wood surfaces by staining over the old finish. To guarantee a successful result, there are several things to consider prior to beginning the process, including ensuring that the new stain is correctly adhered to and looks beautiful afterward.
Factors To Consider Before Restaining The Wood
Before taking on this project, certain factors need to be considered to guarantee its success. These include:
Type of Stain
The nature of the stain is of great importance. Two types of stain can be applied over existing stains:
- Liquid Stain
- Gel Stain
In the case of a liquid one, be prepared to invest some additional effort in application. Gel stains on the other hand provide a more intense color with better coverage and require less effort when applying them.
Gel stains are easy to use and only require minimal sanding in most cases. When it comes to stain darkening or tone modifications, these stains get the work done.
Color of the Existing Stain
When staining over a different color of stain, it is important to choose a color that will work well with the existing color. The color of the existing stain will impact the final color of the newly applied stain.
If the existing stain is very dark, it may be difficult to achieve a lighter shade without removing the old stain first.
On the other hand, if you want to go shades lighter, it’s unlikely that you’ll achieve the desired result. Some colors will mix well together, while others may clash and create an undesirable look. To choose the right color of stain:
- Look for a color that is similar in tone to the existing stain.
- Consider the overall color scheme of the room or space where the wood surface is located.
Condition of the Existing Stain
Secondly, the condition of the existing stain is also a crucial factor. If the old stain is peeling, cracking, or otherwise damaged, it’s best to remove it completely before applying a new coat.
This is because the new stain may not adhere properly or may produce an uneven finish if applied over a damaged or peeling old stain.
In addition, if the old stain has been coated with a layer of polyurethane or some other protective finish, it can be more difficult for the new stain to adhere properly.
In that case, sanding or using a chemical paint stripper may be necessary.
Surface Preparation
Proper surface preparation is critical when staining over an old coat of stain. To get the best results, perform a deep clean of the surface area so that dirt, wax, polish, or grease do not hinder its adhesion.
After the surface has been properly prepped, any debris or leftover dust should be completely wiped down and cleaned before beginning to apply the new stain.
This step is essential to achieve a uniform finish.
Application Technique
The application technique of the new stain is critical to achieving the desired look and coverage.
Both brushing and spraying liquid stains can give you different results so it is critical to experiment with these approaches before making a decision.
What Are The Benefits of Staining Over Stain?
There are many benefits to staining over stain including:
Time-Saving
Removing a stubborn, existing stain can be an incredibly time-consuming and messy process.
Fortunately, staining over the old stain will save you both time and effort as you can easily apply a new coat of stain directly on top of the existing one.
This way, you can quickly restore the original look and feel of your furniture or flooring without having to go through a lengthy and laborious removal process.
Cost-Effective
Stripping off an old, outdated stain and starting from scratch can be expensive, as it requires a significant amount of materials and labor.
However, staining over stain is a highly cost-effective option that can still achieve the same stunning results as starting from scratch.
Enhanced Durability
Staining over existing stains on your surface adds an extra layer of protection and makes it significantly more durable and able to withstand everyday wear and tear.
This additional layer of protection maintains the quality of your surface for a much longer period.
Steps To Applying New Stain On Existing Stain
Once you have evaluated the existing stain and selected the proper type of stain, it is time to apply a new layer. Here are the steps that need to be taken.
Preparing The Wood
To ensure a flawless finish, prep the wood properly before applying the stain. Here are the steps you must take:
1. Clean the Wood Surface
For best results, use a soft-bristled brush to remove dirt from the wooden surface. Afterward, ensure to wipe down with a dry cloth to eliminate any remaining residue.
2. Remove Old Stain
When changing the color of your furniture piece, it is important to know if you’re opting for a lighter or darker tone.
If lighter, then removing the existing stain is necessary; but if you want a darker hue, then leave the original stain undisturbed.
3. Lightly Sand the Surface
To ensure a perfect finish, you should use fine-grit sandpaper (220 grit) to very lightly sand the surface before you apply the stain.
This will enable the stain to adhere nicely and smoothly. But be gentle – don’t over-sand as this can cause harm to the wood underneath.
Once you’ve sanded the surface, use a clean, dry cloth to remove any sanding dust.
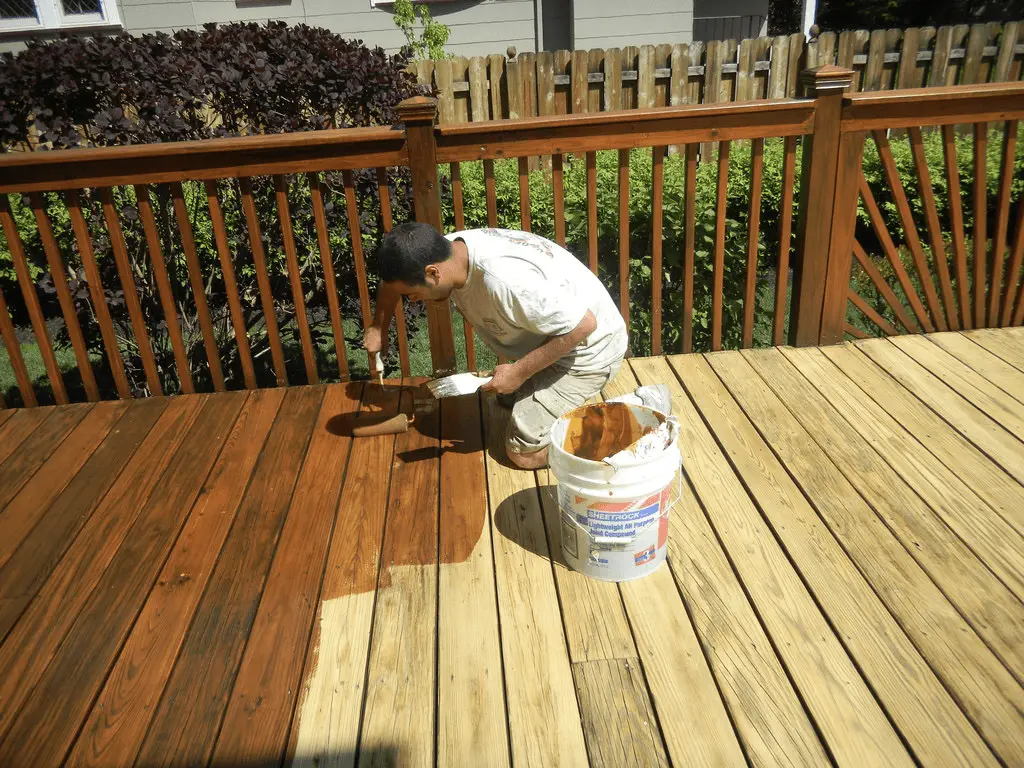
Applying Additional Coats Of Stain
Once the surface is prepped, it’s time to apply a new stain. Depending on the intensity of color and texture you’re looking for, you may need multiple coats to get the desired look.
- Apply a thin, even coat of stain. Be sure to work in the direction of the wood grain to ensure a smooth, even finish.
- Allow the first coat of stain to dry completely, following the manufacturer’s recommended drying time.
- If a deeper color is desired, apply additional coats of stain using the same technique as before. Be sure to let each coat dry completely before applying the next.
- Once you’ve achieved the desired color and finish, let the final coat of stain dry completely.
Applying a Sealant or Protective Finish
To ensure a lasting finish, you’ll need to give the new stain 24-72 hours to cure before applying any type of sealant or protective finish. There are various options available; each offering its own benefits and drawbacks. Here are some options to consider:
1. Polyurethane:
Wood surfaces need protecting and that’s where this product comes in. It delivers a resilient, lasting finish and is available in several different levels of sheen – from matte to glossy.
2. Tung Oil:
Using tung oil to protect wooden surfaces is an excellent choice. It enhances the natural look of the wood and is straightforward to apply. In addition, it guards against moisture and stains very effectively.
3. Wax:
Wax is a classic finish to apply on wooden pieces of furniture and has been used for a long time to preserve the wood while adding a touch of shine. It furthermore prevents potential stains from sticking to the surface.
Can You Stain Over Stain Without Sanding?
Sanding plays a notable role in the process of staining wood; by using abrasive material like sandpaper, any old finish is removed and a strong bond is created between the new product and the wood surface.
Applying a new stain to a pre-stained surface can be done without sanding – though it’s important to remember the results may not be ideal as the new stain might not bond well with the surface. It is generally advised that you sand the surface before staining over an existing stain.
The amount of sanding required will depend on the condition of the surface. If the surface is in good condition, with no major scratches or dents, a light sanding may be all that is needed.
However, if the surface is in poor condition with deep scratches or dents, a more aggressive sanding may be required to remove any existing finish and create an even surface for the new stain.
One of the main reasons why sanding is recommended before staining or painting is because it helps to raise the wood grain.
When wood is sanded, the abrasive material removes the top layer of the wood, which can cause the grain to rise up. The new product is able to attach more securely to the wood due to the rougher surface created.
Without sanding, the new product may not be able to penetrate the surface of the wood, leading to a patchy or uneven finish.
Additionally, sanding smooths out any imperfections in the wood surface such as knots, scratches, or dents. This is especially important when it comes to staining because any imperfections in the wood can affect the way the stain is absorbed and the final color of the wood.
Sanding creates a smooth and even surface which results in a more uniform and attractive finish.
Conclusion
Staining over an existing stain is a great way to give new life to an old piece of woodwork. With the right preparation and a few tips and tricks, you can achieve beautiful and unique results without having to start from scratch.
Before selecting a new color and finishing your wood project, carefully consider the current stain and the state of the wood, then decide if it’s essential to remove old stains.
Don’t limit yourself to just one option- feel free to experiment with different colors until you achieve a desirable outcome.